Clearing Cache on Galaxy S8 and Galaxy S8 Plus: A Step-by-Step Guide
When it comes to my Galaxy S8 and Galaxy S8 Plus, I’ve realized that clearing the cache can make a significant difference in overall performance. If you’re wondering how to do it, I’ve got you covered. Follow this easy step-by-step guide to clear the cache on your Galaxy S8 or Galaxy S8 Plus.
First things first, let’s understand what cache is. Think of it as a storage space where your phone keeps temporary files for quicker access later on. Over time, these files can pile up and cause your phone to slow down or act glitchy. Clearing the cache wipes away these temporary files, giving your phone a fresh start.
Now, let’s jump into the process:
Step 1: Turn on your Galaxy S8 or Galaxy S8 Plus. Get ready to embark on a cache-clearing adventure!
Step 2: Head to the Settings menu. To do this, swipe down from the top of your phone’s screen and tap on the gear icon in the top-right corner. Alternatively, you can find the Settings app in your app drawer.
Step 3: Once you’re in the Settings menu, scroll down until you see the Apps option. This is where the magic happens.
Step 4: Tap on Apps, and you’ll be taken to a list of all the apps installed on your phone. It’s time to dive into the cache-clearing depths!
Step 5: In the Apps menu, you’ll find various sections such as Downloaded, Running, and All. Tap on All to ensure we cover all the bases.
Step 6: As you scroll through the list of apps, you might wonder, “Which ones should I clear the cache for?” Here’s my advice: if you notice an app acting up or using a lot of space, it’s worth clearing its cache. Simply tap on the app you want to target.
Step 7: After selecting the desired app, you’ll be taken to its App Info page. Here, you’ll find a bunch of options and information. To clear the cache, tap on the Storage option.
Step 8: On the Storage page, tap on Clear Cache. Take a deep breath, and witness as your cache disappears into thin air. Keep in mind that this process won’t delete any personal data from the app.
Step 9: Repeat steps 6 to 8 for any other apps you wish to clear the cache for. Remember, only clear the cache for apps that are causing trouble or consuming a large amount of storage.
Step 10: Once you’ve cleared the cache for all the necessary apps, it’s time to exit the Settings menu and get back to enjoying your Galaxy S8 or Galaxy S8 Plus. Simply tap the back button until you’re on your phone’s home screen, or press the home button if you have one.
Hooray! You’ve successfully cleared the cache on your Galaxy S8 or Galaxy S8 Plus. Now sit back, relax, and revel in the improved performance and speed of your beloved device. Go on, give it a try!

If you own a Samsung Galaxy S8 or Galaxy S8 Plus, there are a few troubleshooting solutions that can easily solve the problems you may encounter. These solutions only take a few minutes to complete. The best way to fix any bugs or software problems on your Galaxy S8 or S8 Plus is to either do a factory reset or wipe the cache.
The main reason to clear the cache on a Samsung Galaxy S8 and Galaxy S8 Plus is when the smartphone is experiencing delays, glitches, or freezes. Here is a guide on how to clear the Galaxy S8 cache.
What is the cache and what does it do?
First, let’s understand what the cache is and why you should periodically clear it on your Galaxy smartphone. The Samsung Galaxy S8 and S8 Plus have two different types of caches – the app cache and the system cache. Each app on the Galaxy S8 and Galaxy S8 Plus has its own cache installed on the app.
This cache allows the app to store temporary data for better efficiency when switching between apps. The system cache on the Galaxy S8 does the same thing, but for the phone’s software instead of each individual app. That is why when there are issues with apps crashing or freezing, it’s best to clear one of the caches to help fix the problem.
Clearing the system cache is a great way to clean your phone without performing a full factory reset. Clearing the cache doesn’t delete any photos or contacts (though you may need to log back into certain applications), making it a great first step to fix phone issues.
How to Determine if it’s the System or an App
Knowing which cache to clear can save you time. Consider the following:
- Did you recently download or update an app?
- Has your home screen layout changed?
- Are all your apps and functions misbehaving?
- Does your phone boot up slowly?
If you’re having trouble with only one application, it is likely the cache that needs to be cleared. First, make sure the app is updated by visiting the Google Play Store. Then, follow the steps below to clear the cache.
If your phone is having problems, it could be due to a launcher or recently added app. If you’re experiencing pop-up ads or your home screen layout is changing, it’s a general indication that you have a bad app, but your phone itself is not having issues. To confirm if it’s a bad app, put your phone in Safe Mode. If the problem persists, it’s the phone.
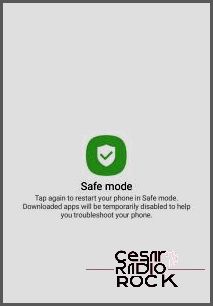
To put your Galaxy S8 in Safe Mode, do the following:

- To turn off your phone, just hold down the power button until you see the ‘Power Off’ option.
- Now, press and hold the ‘Power Off’ option to access Safe Mode.
- In Safe Mode, any third-party apps will be greyed out, making it easier to see if they’re causing any issues.
You’ll know you’re in Safe Mode when you see the Safe Mode icon at the bottom of the screen. It’s a great way to troubleshoot and determine if the problem is with an app or your phone’s system.
If none of these options apply to your situation, or your phone is taking forever to boot up, it might be time for a system cache dump.
How to clear the app cache on the Galaxy S8
If you’re experiencing problems with a specific app, try clearing its cache first. Here’s how:
- Turn on your Galaxy S8 or Galaxy S8 Plus.
- Go to Settings and open the App Manager. If you’re running a different version, it might say ‘Apps’ instead.
- Select the app you want to clear the cache for.
- When you’re on the app’s info screen, select ‘Clear Cache’. You might find this option under the ‘Storage’ tab.
- To clear the cache for all apps, go to Settings and then to Storage.
- Select ‘Cached Data’ to clear the cache for all apps at once.
But be careful not to select ‘Clear Data’ unless you’re okay with losing all the information associated with that app, such as usernames, passwords, game progress, preferences, and settings. This applies to installing and uninstalling apps as well. If the app doesn’t require a login or doesn’t link to your Facebook account, you might lose important data.
What to do if clearing the app cache doesn’t help
If you’ve cleared the cache for individual apps and you’re still experiencing issues with your Galaxy S8, the next best option is to uninstall the app and reboot your device. If the problem persists after rebooting, it’s recommended that you perform a system cache wipe, also known as wiping the cache partition on the Galaxy S8.
How to clear the system cache on the Galaxy S8
- First, turn off your Galaxy S8 or Galaxy S8 Plus.
- Now, press and hold the Volume Up, Power, and Home buttons simultaneously until you see the logo and feel the phone vibrate.
- Release the Power button but continue holding the other buttons.
- Use the volume buttons to scroll down and highlight ‘Wipe Cache Partition’.
- Press the Power button to select the highlighted option.
- Scroll down and select ‘Yes’, then press the Power button.
- Finally, scroll down and select ‘Reboot System Now’, and press the Power button again.
- Your Galaxy S8 will restart with a cleared system cache.
In most cases, wiping the cache should solve smaller problems and is a good starting point for troubleshooting.
Factory Reset
If you want a fresh start and are willing to erase everything on your phone, you can do a factory reset. This is a surefire way to fix any issue, unless it’s a hardware problem like a failing motherboard. Make sure to back up your phone before proceeding, as a factory reset will permanently remove all data.
- To access ‘Settings’, scroll down from the top of your phone’s screen and tap the cog icon.
- Scroll down and find ‘General Management’. You can also type ‘Reset’ into the search bar at the top of the settings screen.
- Tap ‘Reset’.
- Select ‘Factory Data Reset’.
- Tap ‘Reset’ again and enter your password to confirm.
If the problem persists even after the reset, there might be a corrupt file in your backup. In that case, erase it and restore your phone as new.
