Installing Pluto TV on your Roku: A Complete Guide
So, you’re looking to bring the excitement of Pluto TV to your Roku device? Well, you’ve come to the right place! This step-by-step guide will walk you through the installation process, ensuring you don’t miss a beat.
First things first, let’s get started. Here’s what you need to do:
1. Power up your Roku device and make sure it’s connected to your TV.
2. If you’re not already signed in to your Roku account, go ahead and do that. Don’t worry, it’s a breeze!
3. Once you’re signed in, head over to the Roku home screen. You can find it by pressing the Home button on your remote. Easy, right?
Next, let’s move on to the installation itself. Follow these simple steps:
1. Using your Roku remote, navigate to the Roku Channel Store. You can do this by scrolling down with the arrow buttons and pressing the OK button when you find it.
2. In the Channel Store, go to the Search option. Here’s where the magic happens!
3. Type “Pluto TV” into the search bar. Make sure you spell it correctly – we don’t want any hiccups along the way.
4. As you start typing, you’ll see suggested results appear. Find Pluto TV in the list and select it. Don’t worry, it’s hard to miss!
5. On the Pluto TV page, click on the “+Add Channel” button. That’s your ticket to entertainment galore!
6. A confirmation message will pop up. Just hit “OK,” and you’re good to go!
7. After installation, go back to your Roku home screen, and you’ll find Pluto TV waiting for you. It’s as simple as that!
Now, let’s talk about navigating Pluto TV on Roku. Here’s what you need to know:
1. To access Pluto TV, go to your Roku home screen and find the Pluto TV channel. Easy peasy, right?
2. Once you enter Pluto TV, you’ll be greeted by a world of free entertainment. Sit back, relax, and enjoy the variety of channels at your disposal.
3. To switch between channels, use the arrow buttons on your remote. Explore different genres, and find something that suits your mood.
4. Need more information about a particular program? No worries! Just hit the OK button, and you’ll find all the details you need.
5. Want to browse ahead and see what’s coming up? Navigate to the “Guide” option for an overview of the schedule.
6. If you stumble upon something you love, you can even add it to your favorites, making it easily accessible for future viewing.
And there you have it! You’re now ready to enjoy endless hours of free entertainment on Pluto TV, right from your Roku device. So go ahead, grab some popcorn, and let the binge-watching begin! Happy streaming!

Hey there! So, let me tell you about Pluto TV. They want to give you top-notch services without charging a dime. And the best part? You can put Pluto on all your gadgets. It works on Android, iOS, Chromecast, Amazon Kindle and Fire Stick/TV, and also Roku.
Oh, and here’s the cool thing: Pluto has channels for every guilty pleasure you could have. Are you into news? No worries, they’ve got Sky News, NBC News, Bloomberg, and more. And if you’re a fan of crime shows or anime, they’ve got channels just for you, too.
Actually, they’ve got over 100 channels and more than 1000 free TV shows and movies that you can watch whenever you want. So go ahead and get Pluto TV on Roku, no second thoughts necessary.
How to Get Pluto TV on Roku
Step 1
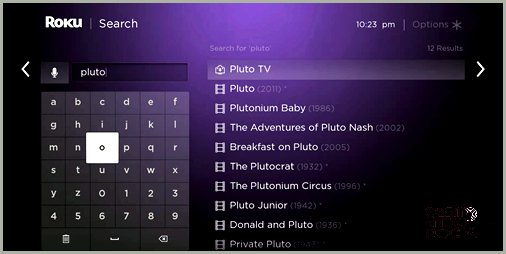
Ready? Start up your Roku and go to “Search” in the Streaming Channels section. Type in “Pluto”.
Pluto TV should pop up as the first choice. Select it, then click “Add channel”.
Step 2
Adding the channel is a quick and easy process that only takes a few seconds. Once you’ve done it, you’ll receive a confirmation message. To complete the process, simply select OK in the pop-up window.
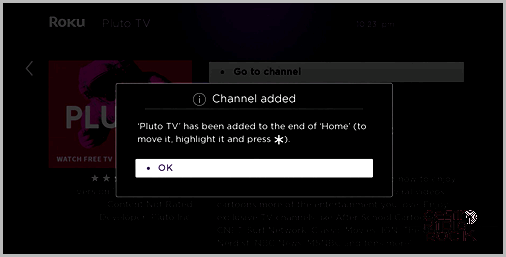
Just a heads up: In case you’re wondering, you’ll find Pluto TV at the very end of the Home list. If you feel like changing its position, all you have to do is select it and press the asterisk key on your remote.
Here’s what you need to do next:
Scroll down until you reach Pluto TV. Once you’ve found it, get ready to dive in by pressing OK on your remote. The channel will load up and start playing in a small window. If you want to make the window bigger, simply use the up and down keys. The goal is to make it as close to the edge of your screen as possible.
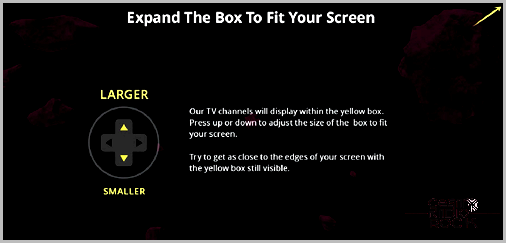
To change the size, simply press the OK button on your remote when you’re satisfied.
Just a Reminder!
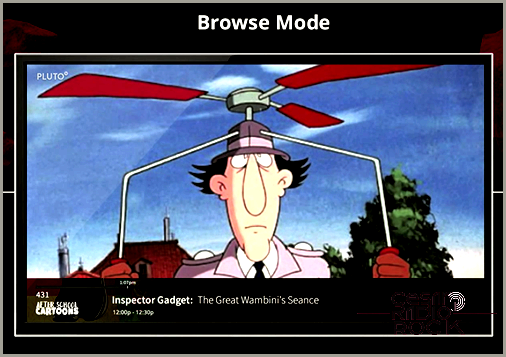
In Guide Mode, you can easily navigate through channels using the up and down keys. These same keys can be used to channel surf in Browse Mode. To switch between modes, just press the OK button.
I’m at Step 4 now. Once I finish the initial setup and quick explanations, I just need to wait a few seconds for Pluto TV to load. And when it’s ready, I’ll see a menu grid that looks like a cable TV channel lineup.
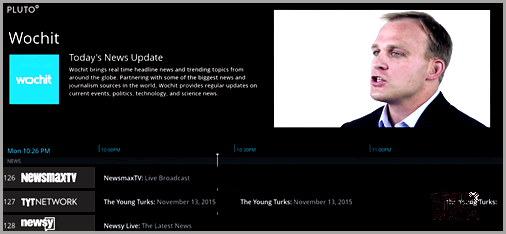
There are different types of channels available on Pluto TV. Some of them have a direct connection to broadcasters and stream live content, while others are collections of pre-packaged news and media clips.
Step 5
Navigation on Pluto TV is incredibly easy. You can use the arrow keys to switch between channels and press OK to watch the one you want. To exit the program, simply press OK again.
Note: In addition to a great selection of channels, Pluto TV also offers radio stations. These stations are categorized under “Pluto TV Music” and can be found from channel 931 onwards.
Compatibility Requirements
As of now, Pluto TV works on Roku devices with firmware version 7.0 or later. This includes Roku MHL and HDMI Streaming Sticks (34XX, 35XX, and 3600X models). It also works on all Roku 3 and 4 models, as well as Roku 1, 2, and SE (models 27XX and 42XX). Additionally, Pluto TV can be accessed on Roku Random with support for 400, 2450, 2500, 26XX, 30XX, 31XX, and 42XX models.
However, older Roku devices such as Roku SD, DVP, HD (N1 100 and 2000C), and XDS are not compatible with Pluto TV. It’s also important to note that Pluto TV only supports the 16:9 aspect ratio.
Additional Setup Tips
If you’re unsure about the firmware version on your Roku device, simply go to the Home screen and press the Settings button. Navigate to the right and you’ll find the system firmware information.
To ensure you have the latest firmware version, go to Settings, select System Update, and install any available updates. Restart your Roku device to complete the installation.
For optimal performance of Pluto TV, a fast and stable internet connection is essential. According to the company, it’s recommended to have a connection speed of 5 Mbps or higher. This will prevent any interruptions or delays that could affect your viewing experience.
Pluto TV in a Browser
One of the best features of Pluto TV is the ability to watch your favorite channels directly in a browser, without needing to install any additional software. Simply go to https://Pluto.Tv, log in, and enjoy your favorite content on demand or live.
From the browser, you can easily adjust the volume and enable closed captioning. Pluto TV works best when using Firefox or Chrome as your browser.
Get Ready for Some Weekend Binging
With the growing popularity of online streaming services and devices, traditional cable and satellite TV are slowly becoming a thing of the past. If you haven’t already, now is the perfect time to join the Pluto TV community and install it on your Roku device.
And when you do, let us know which channels or on-demand videos you enjoy the most. Is it NASA TV from the Curiosity category, or perhaps Minecraft TV from the Geek and Gaming section?
