Clearing Cache on Your Samsung Galaxy J7: A Simple Guide
Hey there! Are you struggling with a sluggish Samsung Galaxy J7? Don’t worry, I’ve got your back. Today, I’ll walk you through the process of clearing the cache on your smartphone, helping you boost its performance and get rid of those pesky speed bumps.
Before we get started, let’s understand what exactly the cache is. Think of it as your phone’s short-term memory; it stores temporary files from apps and websites you visit to help them load faster in the future. However, over time, this cache can become cluttered and may cause your phone to slow down. That’s why clearing it every once in a while is a good idea.
So, ready to give your Galaxy J7 a clean slate? Here’s how you can do it:
Method 1: Clearing App Cache
If you notice a specific app acting up or freezing, clearing its cache can often do the trick. Here’s how:
- Start by heading to the “Settings” app on your Galaxy J7. You can find it by tapping the gear-shaped icon in your app drawer or by swiping down and selecting the gear icon in your notification shade.
- In the “Settings” menu, scroll down and tap on “Apps”. This will show you a list of all the apps installed on your device.
- Pick the app you want to clean and tap on it. This will take you to the app’s details page.
- Once you’re on the app’s details page, you’ll see a bunch of options. Look for “Storage” or “Storage & cache” and tap on it.
- Here, you’ll find two buttons: “Clear data” and “Clear cache”. For now, we’re only interested in the cache, so hit that “Clear cache” button.
- Voila! You’ve successfully cleared the cache for that particular app. Repeat this process for any other apps you want to clean up.
Method 2: Clearing System Cache
In some cases, clearing the system cache on your Galaxy J7 can provide a more significant performance boost. Don’t worry; it’s not as complicated as it sounds. Just follow these steps:
- Turn off your Galaxy J7 completely. You can do this by holding down the power button and selecting “Power off”.
- Once your phone is turned off, press and hold the “Volume Up” and “Power” buttons simultaneously.
- Keep holding both buttons until you see the Samsung logo appear on the screen. When that happens, you can release them.
- You’ll now be in the “Recovery Mode” menu. Here, use the volume buttons to navigate and the power button to select options.
- Scroll down to the “Wipe cache partition” option and select it.
- Confirm your selection by selecting “Yes”.
- Wait for the cache to be cleared. Once it’s done, you’ll be back in the recovery menu.
- Finally, select the “Reboot system now” option to restart your phone.
And there you have it! By following these simple steps, you can easily clear the cache on your Samsung Galaxy J7, giving it a little boost and getting it back in tip-top shape. So, go ahead, give it a try, and enjoy a faster, smoother smartphone experience!

The Samsung Galaxy J7 is one of those phones that gives you affordability and great features, whether you have the older model or the newer 2018 version. It has a fast processor and a sharp AMOLED display that’s perfect for watching movies or reading on the go. Plus, its battery lasts all day. No wonder the Galaxy J7 is so popular among our readers who are on a budget.
But here’s the thing: like all smartphones, the Galaxy J7 can develop issues over time. However, most of the time, the problem is not actually with the phone itself, but with the software it’s running. This could be the operating system or, more commonly, apps that you’ve installed on your device. Luckily, there’s a simple and effective way to deal with these software conflicts: clearing the phone’s cache. Let’s take a closer look at what cache is and how to clear it.
So, what exactly is cache?
Cache is a type of memory where the operating system and apps store information they need to do their jobs. In the case of the Samsung Galaxy J7, there are two types of cache: app cache and system cache.
Each app on your Galaxy J7 has its own cache. This allows temporary data to be stored, making it easier and faster to switch between apps. The system cache on the Galaxy J7 does the same thing, but for the Android software instead of individual apps. When apps start crashing or freezing, it’s often because of conflicting information stored in the cache files. By clearing out the cache, you’ll give yourself a fresh start and hopefully get everything working smoothly again.
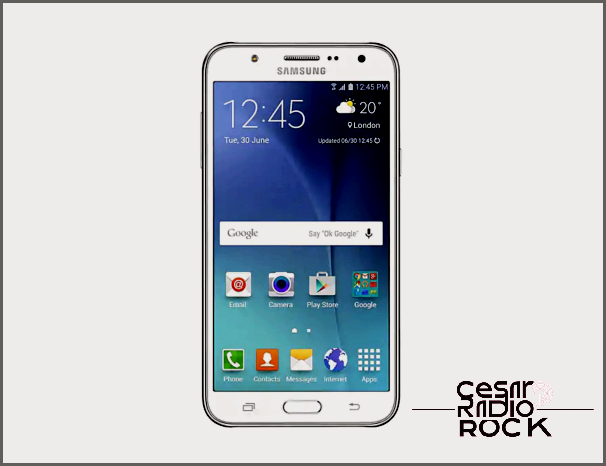
Getting Rid of the App Cache
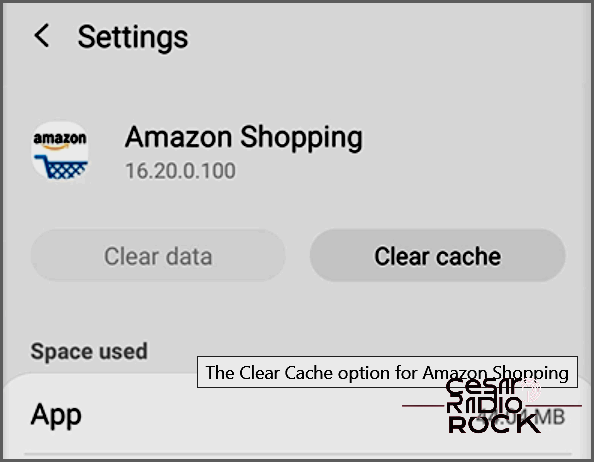
If you’re facing troubles with just one particular app, the best thing to do is to start by clearing its cache. The way to do this might be a little different, depending on which software version your phone is using. For instance, if you have Android 10, you might find ‘Apps’ in your settings, while older versions might have ‘Application Manager’ instead. Here’s how you can clear the app cache:
- First, turn on your Samsung Galaxy J7.
- Next, go to the home screen and tap on the app icon.
- Then, tap on the settings icon.
- Look for the Application Manager.
- Swipe either right or left to display all tabs.
- Select the app you want to delete the cache for.
- Now, clear the cache.
- Tap on “Clear” for the cache option.
- Select “OK” from the options menu.
- Lastly, restart your phone.
If you want to clear the app cache for all apps:
- Go to Settings > Storage.
- Select “Cached Data” to clear all app caches at once.
- Restart your phone.
But be careful not to select “Clear Data” as this will erase all the information stored by the app, including your username, passwords, game progress, preferences, settings, and anything else associated with it.
What to do when clearing the app cache doesn’t help
If you have cleared the cache of individual apps and are still experiencing problems with your Galaxy J7, the next step is to uninstall the problematic app and reboot your device. If rebooting doesn’t resolve the issue, you may need to perform a system cache wipe, which involves clearing the cache partition on your Galaxy J7.
Clear Your Cache Partition
This procedure is a bit technical, so proceed with caution if you’ve never done it before. Wiping your phone’s cache partition will not delete any user data or applications. Instead, it clears temporary data stored by your apps and software, enabling your phone to load app data faster.
Unfortunately, problems can arise if something goes wrong with your cache. Clearing the cache partition should resolve minor issues with your device’s functionality and connections.
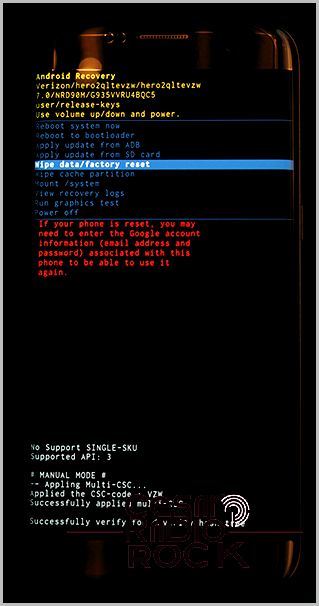
To get started, I advise you to completely power off your phone. Once it’s off, hold down the Home key, the Power key, and the Volume Up key. Keep holding them until you see the words “Recovery Booting” at the top of your screen. It’s okay to let go of the buttons now. After that, you’ll see a blue screen that says “Installing System Update.” It might stay on that screen for about thirty seconds, but then you’ll get a message saying the system update has failed. Don’t worry, that’s normal.
Now, give your phone a few more seconds and the display will change to a black background with yellow, blue, and white text. At the top of your screen, you’ll see the words “Android Recovery.” That means you’ve successfully booted into recovery mode on your Android device. To navigate through the menu, use the volume keys to move the selector up and down. Scroll down to “Wipe Cache Partition.”
In the picture above (showing a Galaxy S7), the option is below the highlighted blue line. Be careful not to select it unless you want to wipe your entire phone. Once you’ve selected “Wipe Cache Partition,” press the Power key to confirm, and then use the Volume keys to highlight “Yes.” Press the Power key again to confirm your selection.
Your phone will start wiping the cache partition. This process will take a few moments, so hold on. When it’s complete, make sure “Reboot device now” is selected. If it isn’t, use the Volume keys to highlight it, and then press the Power key to confirm. Once your phone restarts, check if you’re now connected to your mobile network. If not, it’s time for our final and most drastic step.
FACTORY RESET YOUR PHONE
When all else fails, a full factory data reset of your phone is often the last resort for fixing software-related issues with your Galaxy J7. It’s not a fun process, but it’s a common method that can often solve the problem.
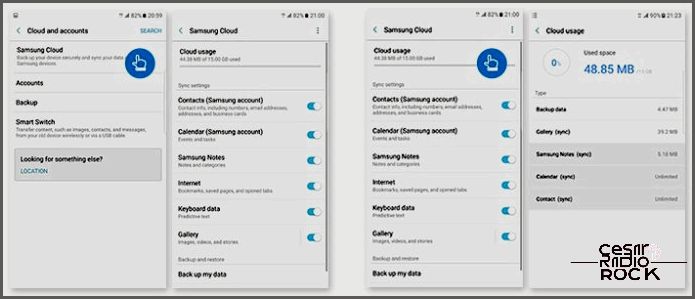
Before you go ahead and do a complete reset on your device, there’s an important step you should take: backing up your phone to the cloud. This is really easy to do and will ensure that you don’t lose any of your important information. Let me show you how!
There are a few options when it comes to backup services, but I have a couple of recommendations that work best with your device. Samsung Cloud and Google Drive are great choices. They’re reliable and easy to use. If you prefer, you can also use Verizon Cloud. Whatever you choose, just make sure it’s a backup service that you trust.
In addition to backing up your device to the cloud, you can also use a couple of apps to save other things like your SMS messages, call logs, and photos. SMS Backup and Restore is a handy app that will save all of your text messages. Google Photos is another great app that will backup all of your photos. It’s always a good idea to have multiple backup options, just in case.
If you want to be extra careful, you can also transfer important files or information to an SD card. This way, even if you do a factory reset, your SD card won’t be affected. Just remember to check the right settings before you proceed with the reset.
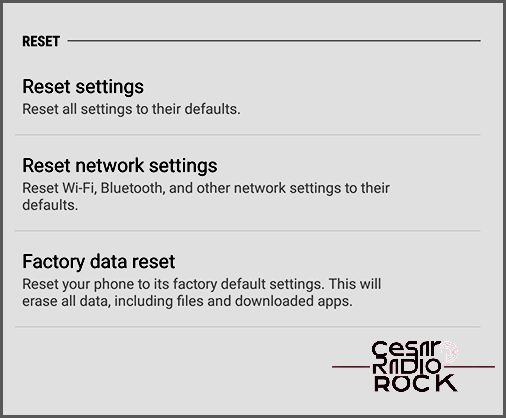
Once you’ve backed up your files, go to your settings menu and choose “Backup and Reset.” You can find it in the “Personal” category in the standard settings menu or under “General management” on the simplified layout.
Next, select the third option, “Factory data reset.” This will bring up a menu showing all the accounts you’ve signed into on your phone, along with a warning that everything on your device will be erased. Remember, your SD card won’t be reset unless you choose the “Format SD card” option at the bottom of the menu. It’s up to you if you want to do this, but it’s not necessary for the process.
Before you tap “Reset phone” at the bottom of the menu, make sure your phone is plugged in or fully charged. A factory reset uses a lot of power and can take up to thirty minutes, so you don’t want your phone to die during the process.
Once you’ve made sure your phone is charging, go ahead and tap “Reset phone” at the bottom of the screen. You’ll need to enter your PIN or password for security. After that, your phone will start the reset process.
Just let the device do its thing; don’t touch your J7 during this time. The reset can take thirty minutes or more. When it’s done, you’ll see the Android setup display. If the factory reset has restored your connection with your carrier, you should see a data connection icon in the status bar at the top of the screen.
