Installing a New Graphics Card on my Windows 10 PC
Hey there! Are you ready to take your gaming experience to the next level? Well, I’ve got some good news for you. Today, I’m going to show you how to install a new graphics card on your Windows 10 PC. Trust me, it may sound a little intimidating at first, but I’ll walk you through it step by step. Let’s get started!
First things first, you need to make sure you have all the necessary tools. Don’t worry, you won’t need anything fancy. Just grab a Phillips screwdriver and a little patience. You got this!
Now, before we get our hands dirty, it’s important to take some precautions. We don’t want any static electricity ruining our new toy, do we? So, make sure to ground yourself by touching a metal object. Safety first, my friend!
Alright, let’s dive into the action. Start by shutting down your computer completely. It’s always a good idea to turn it off before making any changes to the hardware. Safety is key here, so take your time.
Once your computer is off, unplug it from the power source. Safety check number two! We want to avoid any electrical accidents, so let’s stay on the safe side.
Now, locate your computer’s case and remove the side panel. It might be held in place by screws, so grab that trusty Phillips screwdriver we mentioned earlier and unscrew them. Carefully slide off the panel and set it aside. Ah, we’re getting closer!
Next, we need to find the PCIe slot on your motherboard. It’s usually a long, narrow slot that’s perfect for our new graphics card. So, remove the metal bracket covering the PCIe slot and set it aside. We’re making progress!
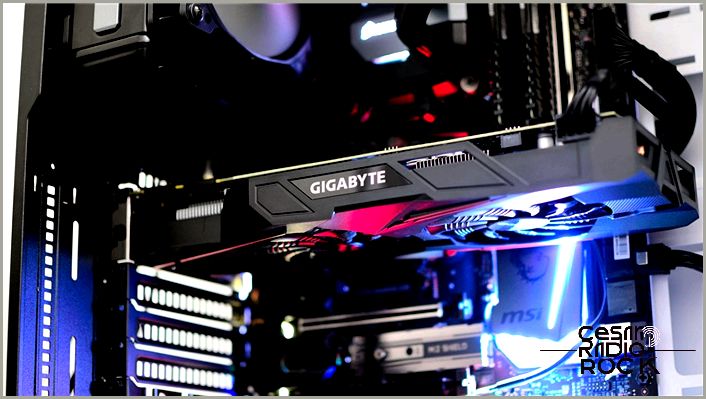
The moment of truth! Take your new graphics card out of its packaging and gently insert it into the PCIe slot. Make sure it fits snugly, but be careful not to apply too much force. Double-check that it’s securely in place. Exciting, isn’t it?
Now, it’s time to secure the graphics card. Grab the metal bracket you removed earlier and screw it back into place, making sure the card doesn’t wobble. There we go, rock solid!
We’re almost there, my friend. Let’s close up our computer. Carefully slide the side panel back into position and tighten the screws to keep it in place. Excellent job!
Finally, it’s time to reconnect our computer to the power source and turn it on. Grab that power cord, plug it in, and press that power button. Take a deep breath, and let the magic happen.
Once your computer boots up, it’s a good idea to install the latest drivers for your new graphics card. Simply visit the manufacturer’s website, download the drivers, and follow the installation instructions. Easy peasy!
Congratulations! You’ve successfully installed a new graphics card on your Windows 10 PC. Give yourself a pat on the back, my friend. Now, go ahead and enjoy those jaw-dropping graphics and amazing gaming experiences. I’m proud of you!

When it comes to improving your gaming experience, boosting video performance, or simply having a more efficient computer, installing a new graphics card is the way to go. It may seem like a daunting task, but fear not! You don’t have to lug your computer to a repair shop. Replacing your graphics card is actually a straightforward process that you can easily do yourself.
So, let’s dive in and find out what you need to do before installing your new graphics card and how to get it up and running in no time. Just follow the steps below, and you’ll be good to go!

How to Install a New Graphics Card on a Windows 10 PC?
If you want to install a new graphics card on your Windows 10 PC and avoid any issues with driver compatibility, it’s important to uninstall the current drivers first. One way to do this is by using the “Device Manager” to uninstall the drivers.
My Recommendation for the Best Budget Graphics Cards
Part One: Uninstall Your Current Drivers
Follow these steps to uninstall your drivers:
- Click on the “Start” menu and search for “Device Manager”.
- In the “Device Manager,” expand the “Display Adapters” section.
- Right-click on your current graphics card and select “Uninstall”.
- Complete the onscreen prompts to delete the driver.
- Your display will temporarily be of low quality. Turn off your computer.
Part Two: Ground Yourself
Before removing the graphics card, it’s important to ground yourself to prevent static electricity from damaging sensitive computer components. Here are some ways to ground yourself:
My Recommendation for the Best Mining GPUs

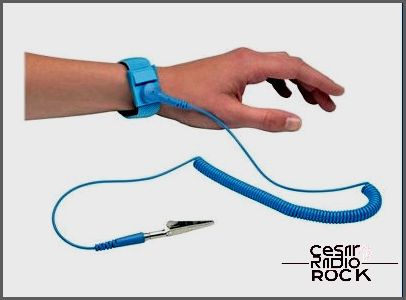
- I recommend using an anti-static wrist strap to keep yourself grounded. Simply attach it to any exposed metal inside the computer case.
- Make sure your computer is placed on a table instead of on a carpet. This will help prevent any static electricity buildup.
- Before working on your computer, always disconnect it from the power supply to avoid any electrical mishaps.
Part Three: Time to Open Up Your Computer
Now that we’re all grounded, let’s go ahead and open the computer case.
Many modern cases have thumbscrews on the back, making it easier to remove the side panels. If yours doesn’t, you can use a Philips-head screwdriver. Here’s how to remove the side panels:
- To access your motherboard with ease, start at the opposite end.
- If you’re not sure where your motherboard is located, check the back of your PC for the I/O panel. It’s the panel with various ports like USB and Ethernet.
- Lay your PC on its side and then unscrew the panel on the opposite side.
Part Four: Let’s Find Your Old Graphics Card

If your monitor was directly connected to the motherboard for integrated graphics, you wouldn’t have a graphics card to remove. In that case, skip this section and go to Part Six.
To find your old graphics card:
- Look for the long PCI-E x16 closest to the heat sink of your CPU. It should be the first or second expansion slot.
- If your computer is older, the graphics card will be inserted into the AGP slot.
The graphics card will probably be the largest card slot on the board, with fans and heatsinks attached to it.
Part Five: Remove Your Old Graphics Card
Here are the steps to remove the graphics card:
- Make sure all cables connected to the graphics card are removed from the back panel.
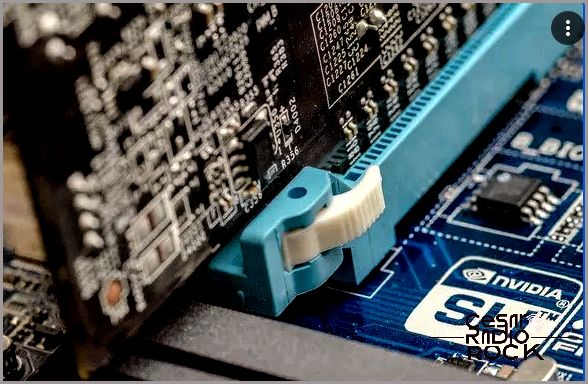
- Use a crosshead screwdriver to unscrew the screws connecting the card to the chassis. On newer cards, there is a tab underneath near the back of the PCI slot that just needs to be released to pull the graphics card out.
- To avoid damaging the PCI slot, pull the card upwards as you remove it.
Part Six: Remove the Dust
Opening up your tower is a great time to get rid of any built-up dust. You can use canned air or compressed air to remove the dust from all the crevices. Dust buildup can cause components to overheat, so giving your PC a good clean now and then can help extend its life.
Part Seven: Install Your New Graphics Card
Here are the steps to install your new graphics card:
- Avoid touching any circuitry or contacts when removing the graphics card from its anti-static bag.
- Before you start, make sure there are no cables or other components in the way. Insert the card into the empty PCI-E slot. Apply a little pressure to the top to get it completely seated. If there’s a clip, you’ll hear it click into place.
- Once the card is securely in place, use the case screws to secure it to the chassis.
- Now connect the power supply. The power supply connector port should be at the top of the card. Connect one or two PCI-E connectors from the power supply.
- Close your computer and then connect your display to your new graphics card.
Part Eight: Install New Drivers
Once you turn on your computer, your operating system will detect the new graphics card and try to optimize your display to use the best resolution and color depth. Accept the changes once this process is complete.
To install the driver:
- If the graphics card came with a driver disk, insert it to start the setup process.
- Alternatively, go to the official website of the graphics card brand, such as NVidia or AMD, to download and install the latest driver.
- Follow the onscreen prompts to complete the setup process.
How to Install the New Graphics Card Drivers on a Windows PC?
This section will explain how to install your new graphics card using Windows 7 or 8. The steps are mostly the same as in the Windows 10 section above, so here is a condensed version:
Part One: Uninstall Your Current Drivers
To ensure a clean installation and prevent potential driver incompatibility issues, follow these steps to uninstall your drivers using Windows 7 and 8:
- Go to the “Start” menu and search for “Device Manager.”
- In “Device Manager,” expand the “Display Adapters” section.
- Right-click on your current graphics card and select “Uninstall.”
- Follow the prompts to delete the driver.
Part Two: Ground Yourself
To avoid your body’s electrical charges potentially interfering with highly conductive computer parts, you need to ground yourself.
You can do this by disconnecting the computer from the power supply. You may also consider wearing an anti-static wrist strap attached to the exposed metal in the case.
Part Three: Open Your Computer
Make sure all peripherals are disconnected, and then remove the side panel opposite your motherboard. The motherboard will have the I/O panel. Lay your PC on its side to unscrew the opposite panel.
Part Four: Find Your Old Graphics Card
Your old graphics card is likely the largest card on the board, with fans and heatsinks attached to it. Typically, it’s in the first or second expansion slot on your motherboard.
Part Five: Remove Your Old Graphics Card
Follow these steps to remove the graphics card:
- Make sure all cables connected to the graphics card are removed from the back panel.
- Unscrew the screws connecting the card to the chassis or release the tab underneath it.
- Gently pull the card upwards to remove it.
Part Six: Remove the Dust
This is a good opportunity to remove any accumulated dust. You can use canned air or compressed air to blow out the dust from all the crevices.
Part Seven: Install Your New Graphics Card
Follow these steps to install your new graphics card:
- Before you start, make sure there are no cables or other components in the way. Insert the card into the empty PCI-E slot. Apply a little pressure to the top to ensure it is fully seated.
- Once the card is in place, use the case screws to secure it to the chassis.
- Connect the power supply and close the case.
- Reconnect your display to the graphics card.
Part Eight: Install New Drivers
Once you turn on your computer, your operating system will detect the new graphics card and try to optimize your display to use the best resolution and color depth. Once your computer finishes this fine-tuning, accept the changes.
To install the driver, use the driver disk if it came with the card. Otherwise, go to the brand’s official website to download and install the latest drivers.
Additional FAQ
Do You Need to Uninstall Your Old Graphics Card Before Installing a New One?
Yes. Your monitor will use your new graphics card, so there is no need for the old one that will just take up unnecessary space.
Computer Power
Once you start using your new graphics card, you’ll notice a difference in your computer experience, especially with tasks like video editing, gaming, and cryptocurrency mining.
Swapping out your old graphics card is pretty simple. Remove the old one, uninstall its drivers, find the new one’s spot on the motherboard, and put the new card in. Then install the latest drivers, and you’re ready to go!
