Creating or Changing Your Email Signature in Outlook
Hey there! Are you looking to add a personal touch to your emails? Well, you’ve come to the right place. In this guide, I’ll walk you through the process of creating or changing your email signature in Outlook.
First things first, let’s dive into the nitty-gritty of how to get this done. You’ll need to follow a few simple steps, but don’t worry, I’ll be here to guide you every step of the way.
1. Open Outlook: To start, open up your Outlook application. You can find it either on your desktop or in your start menu.
2. Access Your Account Settings: Once Outlook is open, click on the “File” tab in the top left corner of the screen. This will take you to a new window with a menu on the left side. Select “Options” from that menu.
3. Go to the Signature Settings: In the Options window, you’ll see a bunch of tabs on the left side. Click on the one that says “Mail” to go to the email settings. From there, look for the “Signatures” button and click on it.
4. Choose a Signature: In the Signatures window, you’ll have the option to create a new signature or edit an existing one. If you want to create a new one, click on the “New” button and give it a name. If you already have a signature and want to change it, select it from the list.
5. Create or Modify Your Signature: Now comes the fun part – customizing your signature! In the text box provided, you can type in whatever you want your signature to say. Feel free to include your name, job title, contact information, or anything else you think is important. You can also format your signature using the toolbar at the top.
6. Add an Image (Optional): If you want to add some visual flair to your signature, you can also insert an image. To do this, click on the “Picture” button in the toolbar and select an image from your computer. Make sure to resize it if necessary to keep your signature looking sleek.
7. Apply the Signature: Once you’re happy with your signature, click “OK” to save it. You can choose to set this as your default signature for new messages, replies, or both. Just make sure to select the appropriate options from the drop-down menus.
And that’s it! You’ve successfully created or changed your email signature in Outlook. Now whenever you send an email, your signature will be there to add a personal touch. Pretty cool, huh?
Remember, if you ever want to tweak your signature or create a new one, just follow these steps again. It’s a breeze once you get the hang of it.
So go ahead, give it a try! Show the world your individuality and make your emails stand out with a snazzy signature. Happy emailing!

Email signatures are like virtual business cards that contain important information, such as your contact details, job title, and company information. They also serve as a closing to your emails, making it easier for people to contact you while adding a professional touch to the emails they send you. This guide will show you how to create or change your email signature in Outlook across the web, desktop, and mobile apps.
How to Create or Edit a Signature in Outlook.com
Outlook.com provides a simple way to add or edit a signature for your emails. Although you may not get the same functionality as the desktop or Android/iPhone app, it gets the job done.
- Open your browser, go to Outlook.com, and log in using your credentials.
- Click the gear icon in the top right corner to open the Settings menu.

- Click on Mail, followed by Compose and Reply in the Layout section.
- A text box will appear, and right above that, you will see an option for + New Signature; click on it.

- Enter your signature. Use the formatting tools available to personalize the signature according to your needs, and then click Save.

- To edit your signature, click the drop-down and select the signature you want to edit. You can edit it from the same text box and click on Save to save the changes.
The best part of adding a signature via the web and the desktop app is that you get more formatting options, allowing you to customize the signature as you like.
How to Create or Edit a Signature in Outlook for Windows or Mac
Outlook for Windows or Mac is a mature and well-rounded email client. It has all the features you’d want, including integration with third-party apps, extensive formatting tools, and more. Adding or editing your email signature is also easy using Outlook’s desktop app.
- Open the Outlook app on Windows or Mac and log in with your credentials.
- Click the File tab in the top left corner, and then select Options.
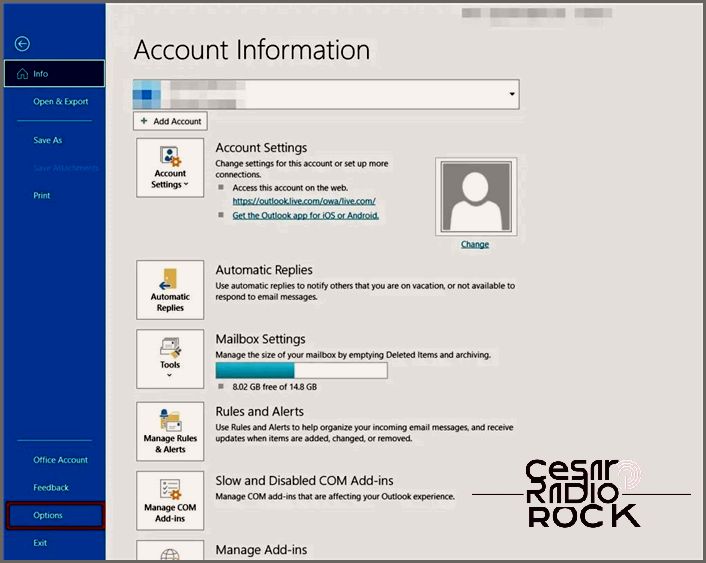
- In the Options menu, click on Mail. This will open up the settings menu related to Mail.
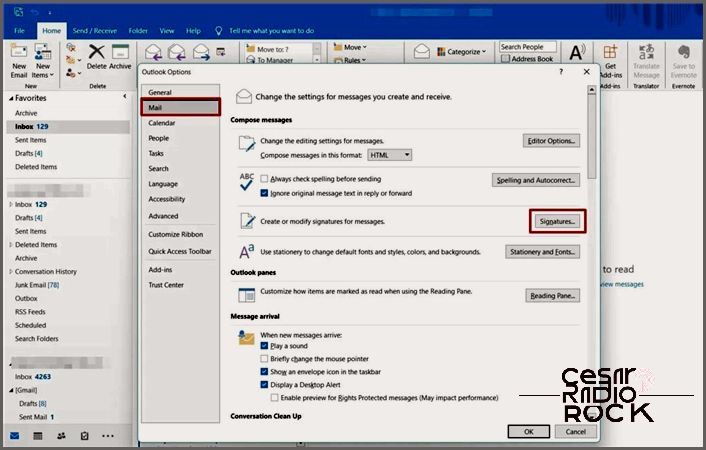
- Under Compose messages, you will see an option that says Create or modify signatures for messages.
- Next to it, there will be a Signatures button. Click on that.
- To add a new signature, click the New button and then provide a name for your signature.
- In the text box, enter your desired signature. You can use the formatting options to insert a hyperlink, an image, or a business card.

- Click on Save and then on OK.
If you want to edit a signature, simply click on the Signature name you would like to edit, and the signature will appear in the text box below. Now, edit the signature from the same text box and click Save. You can have multiple signatures in Outlook and switch between them based on your requirements.
If you have Outlook synced with Gmail, you can have your sent emails use the signature set up in your Gmail account.
How to Create or Edit a Signature in Outlook for Android or iPhone
Outlook’s Android or iPhone app provides a great way to access your emails while on the go. You can also use the mobile app to manage your signature, although the options are limited here.
- Open the Outlook app on your Android or iPhone.
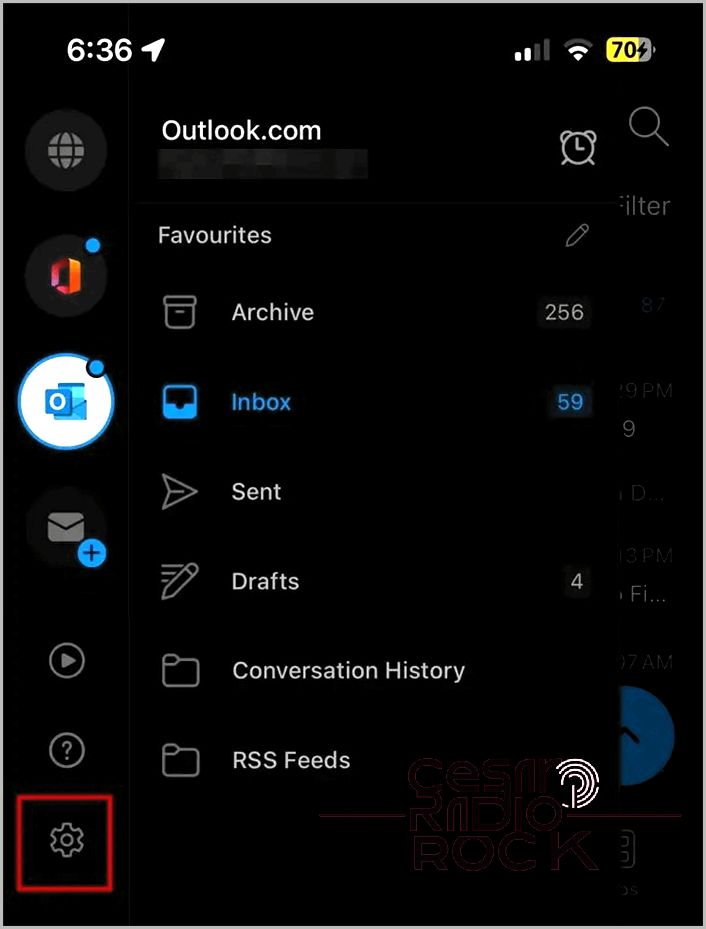
- Bring up the menu by tapping the Outlook logo in the top left corner of the screen.
- Tap the gear icon to open Settings.
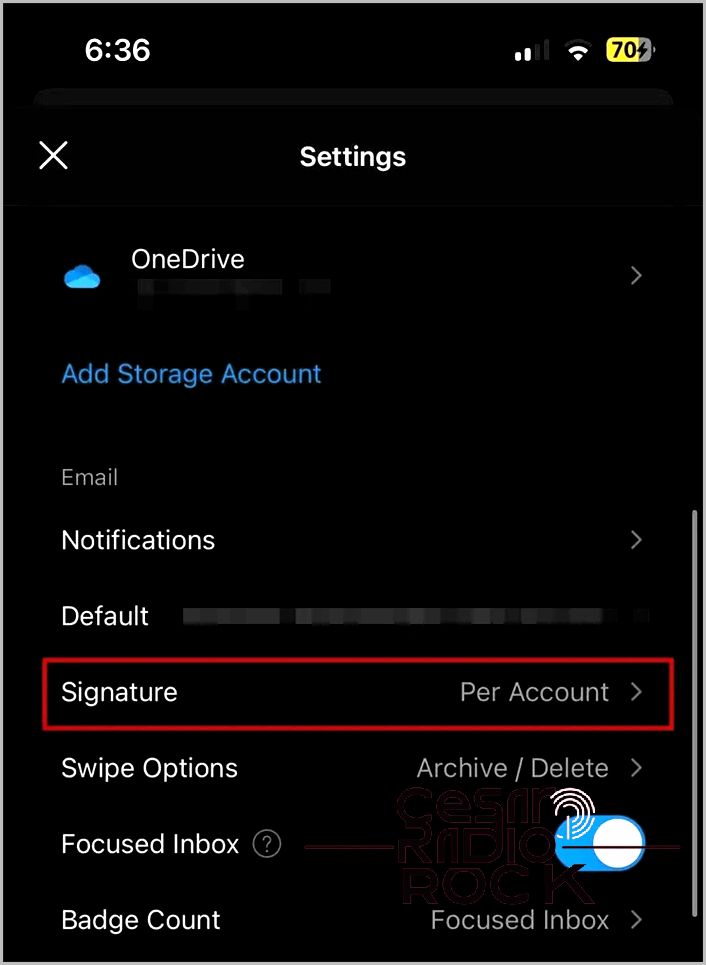
- Now, scroll down until you see the Email section; under that, you will find Signatures. Tap on that.
- You can enter your signature in the text box provided on the screen. Customize it as per your requirement using the available formatting tools. Tap the tick mark when done.
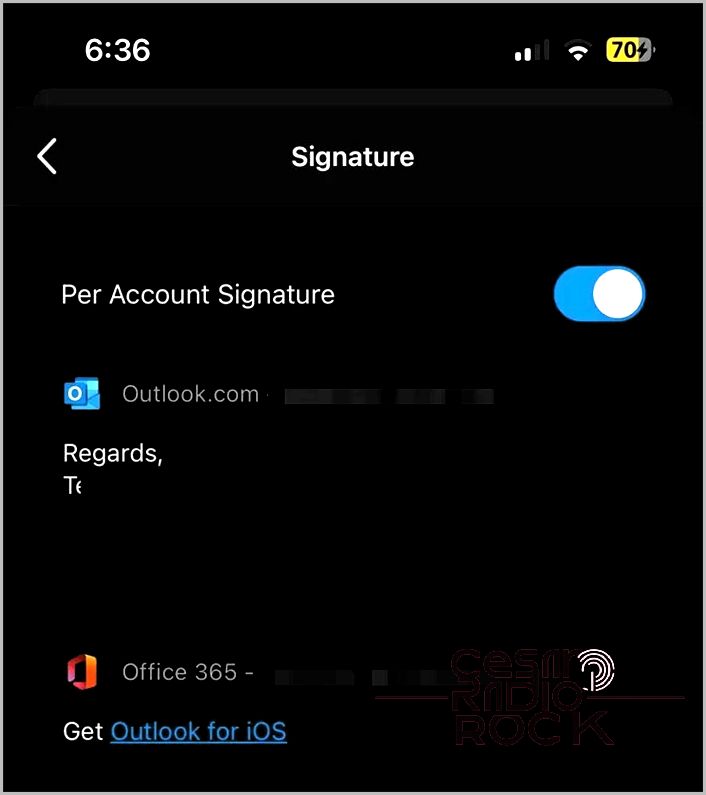
Unfortunately, Outlook’s mobile app doesn’t support multiple signatures. This means that you can only edit your main signature or replace it with something new.
While the Outlook app for Android or iPhone doesn’t have a feature to manage signatures, you can easily turn them off if you prefer not to use them.
Create an Eye-Catching Signature
Email signatures play a crucial role in professional communication. Taking the time to create a polished and professional-looking signature can have a significant impact on your professional interactions, while also saving you time.
If you use Gmail instead of Outlook, you can add a Canva email signature to your messages to give them a bit of flair.
Frequently Asked Questions
Q: Can I have multiple signatures in my Outlook account?
A: Yes, you can have multiple signatures in Outlook on the web and the desktop version of the application. While there is no official limit from Microsoft, sources suggest that only the first 255 created signatures will be visible.
Q: Can I import my Outlook Signatures?
A: Previously, Outlook allowed you to back up and import your signatures. However, Microsoft has removed this option.
