Backing up your data onto a Blu-ray Disc
Hey there! Today, I want to show you a step-by-step guide on how to back up your important data using a Blu-ray Disc. Trust me, it’s easier than you think!
Now, I know what you’re probably thinking – “Why would I want to use a Blu-ray Disc instead of my trusty old external hard drive?” Well, my friend, let me tell you. Blu-ray Discs offer a level of durability and longevity that other storage options simply can’t match. They are resistant to water, dust, and scratches, and can last for decades if properly handled. Plus, they provide a convenient physical solution for safeguarding your valuable data.
Alright, let’s dive into the nitty-gritty of the process.
Step 1: Prepare your equipment.
Before you begin, make sure you have everything you need. You’ll need a Blu-ray burner drive connected to your computer and a blank Blu-ray Disc with sufficient storage capacity. Also, ensure that you have the necessary software to create the backup.
Step 2: Select the data you want to back up.
Now comes the fun part – deciding which files and folders you want to save. It could be precious family photos, important documents, or even that collection of cat videos you can’t live without. Just make sure you have enough free space on the Blu-ray Disc to accommodate your selected data.
Step 3: Start the backup process.
Here’s where the magic happens. I’ll guide you through the steps using the software you have installed. Don’t worry, it’s all pretty straightforward.
First, open the backup software and select the option to create a new backup. Next, choose the files and folders you want to include in the backup. You may have the option to compress the data, which can help save space on the disc. Once you’re satisfied with your selections, click on the “Start Backup” button and let the software begin its work. Sit back, relax, and let it do its thing.
Step 4: Verify and finalize the backup.
When the backup process is complete, it’s important to verify that everything was successfully copied onto the Blu-ray Disc. Most backup software provides a verification feature, which ensures the integrity of your data. Take a few extra minutes to go through this step – you wouldn’t want any surprises later on!
Finally, once you’re confident that the backup is accurate, it’s time to finalize the disc. This step ensures the data cannot be modified or deleted accidentally. Again, the software should provide an option for finalizing the disc. Simply follow the prompts, and you’re all set!
And there you have it – a step-by-step guide on backing up your data to a Blu-ray Disc. Now you can rest easy knowing your important files are safely stored and protected. Remember to store the disc in a cool, dry place for longevity.
Backing up might not be the most exciting task, but it’s definitely worth the effort. Trust me, you’ll thank me later when you’re saved from a potential data disaster. Enjoy the peace of mind, my friend!

I received an interesting question in my TechJunkie mailbox today. It wasn’t the typical backup question, though. This time, the reader wanted to know how to backup their data to a Blu-ray disc. Usually, we don’t backup data this way, but I thought it would be a great opportunity to provide a tutorial.
Personally, I don’t believe using a disc to backup data is the best method. However, at TechJunkie, we believe in the freedom of information. So, I’ll show you exactly how to backup to a Blu-ray disc, but I’ll also offer some potentially better alternatives.

How to Backup Your Data on a Blu-ray Disc
Hey there! Today, I want to show you how you can keep your important photos safe by backing them up onto a Blu-ray disc. It’s a simple and effective way to make sure you always have copies of your precious memories, just in case anything happens to your computer’s storage drive. Plus, Blu-ray discs are perfect for home use because they can hold up to 25GB of data, are affordable, and sturdy!
Before we begin, make sure you have a Blu-ray writer on your PC. You’ll also need some writable or re-writable Blu-ray discs. The ones you’re looking for are called Blu-ray Disc Recordable (BD-R) or Blu-ray Disc Recordable Erasable (BD-RE). The recordable ones can be used only once, while the erasable ones can be reused. Either type will work just fine.
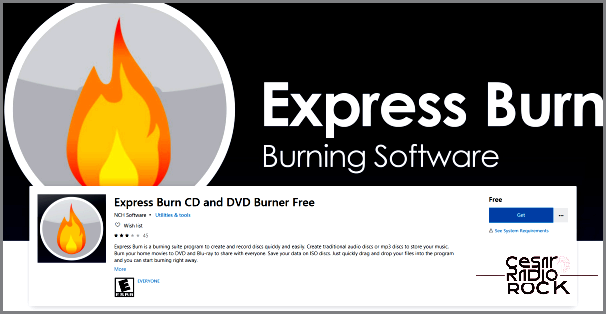
Lastly, you’ll need software to help you with the backup process. There are a few options out there, such as Express Burn CD and DVD Burner Free, Burnaware, Leawo Blu-ray Copy, and Wondershare DVD Creator. Since I’m using a Windows PC, I’ll be using Express Burn CD and DVD Burner Free, which you can find in the Windows Store and best of all, it’s free!
- Gather all the files you want to back up into one folder or compress them into a single file if needed.
- Download and install Express Burn CD and DVD Burner Free or your preferred software.
- Open the software and choose the “Data Disc” option to create a Blu-ray disc for your image backup.
- Select your Blu-ray drive as the destination where your backup will be saved.
- Choose the file or folder you want to back up as the source.
- When you’re ready, click on “Burn Data Blu-ray” located in the bottom right corner of the program.
The software will start compiling the data and writing it onto the disc. You’ll hear the familiar sounds coming from your optical drive and see a progress bar within the program to keep you updated. Once it’s completed, the drive will eject the disc. Remember to label it clearly, so you know what’s on it, and store it in a safe place. It’s not a great idea to keep your backup right next to your computer, as it could easily get damaged. Better safe than sorry!

Explore alternative methods for data backup
I discovered that traditional optical drives are becoming outdated in terms of efficiency for computer backups. Although they can store up to 25GB of data, that might not be sufficient for larger files like games and certain programs. Even splitting files across multiple Blu-ray discs can quickly become a messy and inconvenient process.
Fortunately, there are other more practical solutions available for backing up your data.
Consider removable drives
Portable or removable hard drives offer a cost-effective and user-friendly way to backup your important files. For less than $60, you can purchase a 1TB Seagate expansion disk, which should easily accommodate most of your needs. I personally rely on one of these as my secondary backup option. Although it’s not an SSD, it delivers excellent performance, operates quietly, and gets the job done.
The introduction of USB 3.0 further enhances the usability of these drives as backup options. With no need for additional software, you can simply format the drive and then drag and drop files and folders onto it.
Embrace the convenience of cloud storage
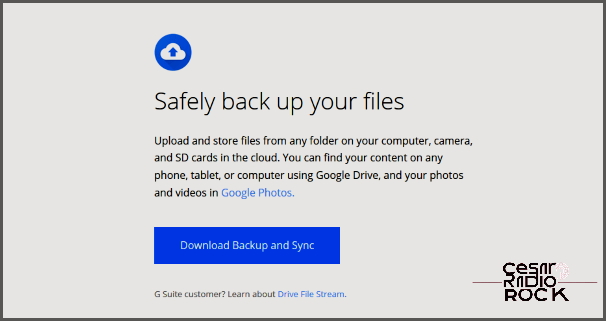
Cloud storage is another fantastic option for data backups. While I must admit that OneDrive is not the most reliable choice due to occasional freezing, it is free and comes pre-installed on Windows machines. On the other hand, Google Drive offers a great sync app that keeps your files up to date. In my case, I rely on Google Sync for work, which automatically backs up my Work drive every ten minutes. Plus, with 15GB of free storage, space is never an issue.
However, it’s worth mentioning that cloud storage may not be the most practical choice if you have a limited data plan or rely heavily on mobile data. Nevertheless, for most users, it seamlessly integrates into your computer, continuously protecting your data without requiring any additional effort on your part.
Both removable drives and cloud storage serve as reliable backup options, especially if your computer lacks Blu-ray or any optical drive functionality. Regardless of the method you choose, regularly updating your backups is crucial in today’s digital age, where cherished memories, music collections, and movies are all stored digitally. Ensuring the safety and security of these valuable assets has never been more important!
