My Journey with Acer eRecovery Management
So, I took the leap and upgraded my laptop’s 500GB HDD to a 256GB SSD. Specifically, this one. And of course, the price dropped by 25 dollars the following week. Hate it when that happens. Don’t worry, I’ll share my experience using the SSD soon.
Now, here’s the thing about laptops – most of them don’t support multiple internal hard drives. Well, not in the usual way at least. Some high-end models can handle SSD+HDD setups, but chances are your laptop only has a single HDD. What this means is that when you switch drives for another HDD or SSD, you need to reinstall the operating system (OS).
As luck would have it, my laptop, like many others out there, didn’t come with any OS recovery discs. However, being an Acer system, it did come bundled with the Acer eRecovery Management application, which lets you create those discs yourself. Yes, you read that right – you get several discs. And this is my story of using that application.
I’m sure you have two big questions on your mind right now:
1. Did it work?
2. Did I encounter any problems?
Well, the answer to the first question is a resounding yes, and the answer to the second question is no. Everything worked like a charm, which honestly surprised me.
Even if you don’t have an Acer laptop, chances are your laptop came bundled with an app that allows you to create recovery discs. But let me tell you, the Acer app is definitely better than most I’ve seen.
My Hesitation with OS Recovery Programs and the Pleasant Surprise
I’ve always preferred having the actual physical discs, provided directly by the manufacturer. Why? Well, past experiences have taught me that recovery apps that create discs always miss something. Sure, the OS gets installed, and things seem to work fine, but there are always missing drivers. You end up having to visit support.[insert-OEM-here].com, find your model, download drivers – it’s a whole ordeal. And usually, you have to use a separate computer to get the drivers because the networking doesn’t work until you install them.
But let me tell you, Acer did an exceptional job with their recovery discs. They covered everything, and that’s what surprised me. When I was done with the whole process, it was truly done. Everything that came with the laptop when I first bought it was there – even the default wallpaper. Acer paid incredible attention to detail, and it has given me a newfound respect for the brand. Dell or HP could never match this level of quality in their recovery discs.
Creating the Discs
The app created a total of four DVDs. Three were for installing the OS and drivers, and I later found out that I didn’t even need the fourth one, which was for extra drivers.
The disc writing process was painfully slow because the app not only wrote the data but also verified each disc. It’s like waiting for an entire DVD-5 disc’s worth of data to be written twice. I understand that the verification step is necessary to ensure accuracy, but it definitely involved a lot of waiting.
The app also made it clear that I needed to have my laptop plugged into the power cord while it was creating the discs.
Using the Discs
Now came the exciting part – testing if this whole process actually worked.
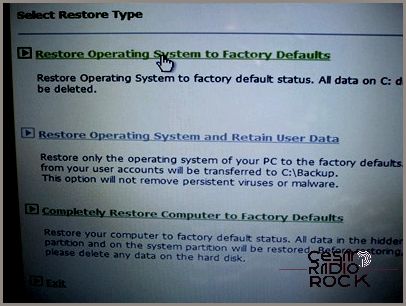
I booted from my external DVD burner, and the first disc booted up perfectly. I was presented with some options to choose from.

I really like that all three options you’re given are thoroughly explained. I chose the first option because the drive was completely new and didn’t have any existing user data for the app to retrieve.
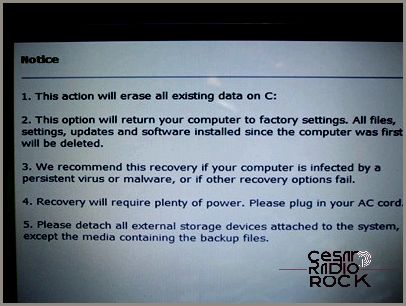
No matter which option you choose, they clearly explain what’s going to happen in simple terms.

One thing I find interesting is point 5, because when you connect external storage, it can mess up the installation.
Finally, let’s talk about getting to the desktop
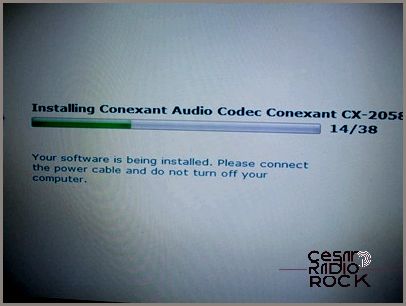
The installation process for Windows 7 Home Premium 64-bit was surprisingly fast. It probably took less than 30 minutes (I wish I had timed it, but it didn’t cross my mind). However, what took an incredibly long time was the automatic installation of all the drivers that followed.
I found myself staring at this screen for what felt like an eternity.

I want to start by saying that I made sure to connect the power cable properly. The Acer app reminds you repeatedly to keep that power cord plugged in, or else your laptop will explode into flames and everyone in space will see it.
What I didn’t have to do
Once everything was installed, I had a pleasant surprise. I didn’t have to download a single driver. I thought for sure I’d have to deal with the frustration of missing drivers, but everything was there, ready to go.
Another thing I didn’t have to do was activate Windows again. I was fully prepared to go through the usual process of online activation or having to call Microsoft, but it wasn’t necessary. The operating system installed smoothly without any activation notices. Pretty cool, if you ask me.
And the best part? I didn’t have to “fix” anything. Whenever I reinstall Windows from scratch, there’s always something that needs tweaking. Maybe the touchpad settings are wonky or the screen is blindingly bright. But none of that happened with the Acer laptop. It worked flawlessly right from the start.
The only task I did have to tackle was uninstalling some unnecessary software that came pre-installed. I had to get rid of the “Trial Edition” of Microsoft Office 2010 and a few pointless games. But let’s be honest, that’s expected when you buy a new laptop these days.
End result: It worked so well, I’m amazed nothing went wrong
I’ve installed Windows countless times on different computers, and I’ve come to expect that something will inevitably go wrong. But this time, everything went perfectly. I still can’t believe it as I write this.
Kudos to Acer for their excellent eRecovery Management app. It’s top-notch and does exactly what it’s supposed to do.
