How to Fix ‘msvcr120.dll is Missing’ Errors in Windows
Missing files are a common problem in Windows. Sometimes files can get lost, corrupted, or overwritten, and while Windows can fix some missing files on its own, it can’t handle all of them. One common issue is the ‘msvcr120.dll is missing’ error in Windows. Don’t worry, though, I can show you how to fix it.
The msvcr120.dll file is a part of the Visual C++ Redistributable Packages for Visual Studio 2013. It’s commonly used in graphics-intensive programs like image editors, video editors, and games. This error often occurs with games, but I’ve also seen it happen to Adobe users and graphic designers.
What Does a DLL File Do?
Before we get into how to fix the error, let’s talk about what a .dll file is and what it does. A .dll file, short for Dynamic Link Library file, is a file that provides a library of commonly used files within Windows. Any program can access these files, so instead of installing separate copies for each program, Windows installs a single copy in a central location that any program can use when needed.
This saves disk space, memory, and system resources because these files are shared. Programs don’t have to install multiple files, and when the code improves or a newer version is available, only one instance of a file needs to be updated. It’s a pretty nifty feature of Windows that works really well.
How to Fix ‘msvcr120.dll is missing’ Errors
Surprisingly, the error itself gives us a clue about what’s wrong. It tells us that the file ‘msvcr120.dll’ is missing, corrupted, or unusable for some reason. It could have been accidentally deleted by a user or a program, or it might have been overwritten or corrupted. But, don’t worry, we just need to reinstall the file to fix the error.
Since ‘msvcr120.dll’ is part of the Visual C++ Redistributable Packages for Visual Studio 2013, we need to install the whole package. Luckily, Microsoft makes it available for download.
- Go to the Microsoft Download Center page for Visual C++ Redistributable Packages for Visual Studio 2013.
- Select your language, and click on the Download button.
- Choose both the x86 and x64 versions of the file.
- After downloading, install the package. It might install without any issues, or you might see the option to Repair or Overwrite. If you see this option, select Repair.
- Test the program that originally showed the ‘msvcr120.dll’ error to make sure it’s fixed.
The error itself doesn’t tell us whether the missing file is in the 32-bit or 64-bit part of the system. Even if you’re using a 64-bit computer, Windows still uses 32-bit files. Visual Studio uses both types of files, so to completely fix the issue, we need to replace files for both 64-bit and 32-bit. That’s why you should select both options when downloading the package.
After installing both versions, your system should be good to go. The error should be gone, and everything should work as it should.

How to Refresh Your Graphics Driver to Fix “msvcr120.dll is Missing” Errors
Have you ever encountered the frustrating situation where replacing the msvcr120.dll file doesn’t solve the issue? It’s not a common occurrence, but it can happen. In such cases, the problem usually lies with the graphics driver, and the solution is a simple driver refresh. Let me guide you through a step-by-step process that can help you avoid common issues when updating your graphics driver.
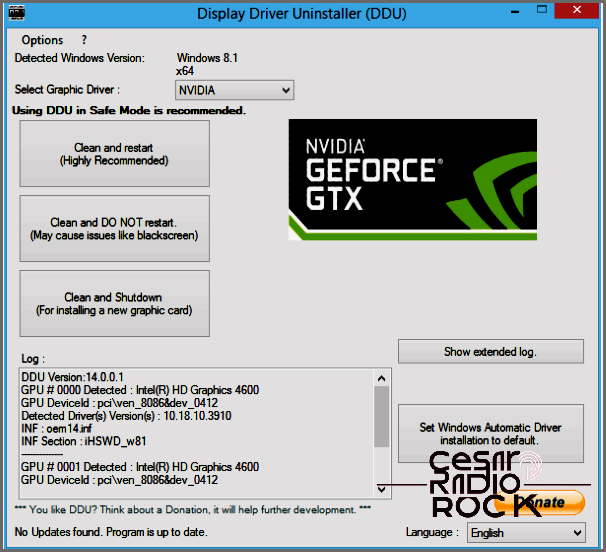
- First, download and install Display Driver Uninstaller DDU.
- Next, get the latest graphics drivers specifically designed for your card.
- Once you have the necessary files, run Display Driver Uninstaller DDU and select “Clean and restart”.
After your computer restarts in Safe Mode, the DDU program will automatically uninstall your current graphics driver. At this point, you have two options: you can either stay in Safe Mode and proceed to install the new driver, or you can reboot your computer in normal mode and then install the new driver. Either way, all the old files will have been removed, making way for the fresh installation of your graphics driver.
Graphics driver packages often include the option to replace files during the update process. However, there are situations where these packages don’t work perfectly. For example, if there are changes in the file structure, certain files become outdated, or if you have made customizations to your Windows system. By completely removing the previous driver before installing the new one, you can avoid the majority of graphics driver issues that you might encounter.
If you’re still experiencing “msvcr120.dll is missing” errors in Windows, even after trying to replace the Visual C++ Redistributable Packages for Visual Studio 2013, updating your graphics driver is usually the most effective solution.
Do you know of any other methods for fixing “msvcr120.dll is missing” errors? If you do, please share them with us in the comments below!
