Creating and Managing Your Apple ID: A Simple Guide
Welcome to the world of Apple! Your Apple ID is like a personal key that unlocks all the amazing features and services offered by Apple. Whether you’re a home user or a business professional, it’s crucial to safeguard and efficiently manage your Apple ID.
If you’re new to the Apple ecosystem and want to effortlessly create and manage your Apple ID, this beginner’s guide is perfect for you.

Create Your Apple ID
Your Apple ID is your ticket to accessing all the great Apple services and devices. It’s what you’ll use to log in and enjoy iCloud, your iPhone, iPad, iMessage, the App Store, iTunes, FaceTime, and more. Your Apple ID is the key that unlocks your entire Apple experience.
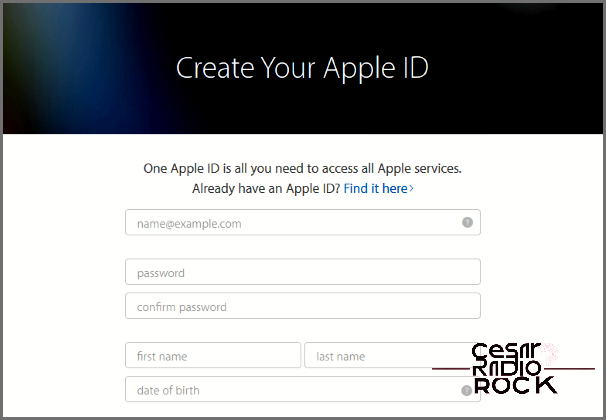
- To get started, head over to the Apple website.
- Use your regular email address to create your Apple ID. You’ll receive a confirmation email from Apple to verify and activate your account. Just remember, you can’t use an email address that’s already linked to another Apple ID.
- Complete the form by filling in your personal details and answering security questions.
- Make sure to provide your correct country of residence. Apple has different regulations for different territories, so accuracy is important. Also, your billing address needs to match your credit card information to ensure seamless purchasing.
Using Your Apple ID
Now that you have your Apple ID, it’s time to start using it!
- In iTunes, simply click on the Sign In link located at the top right of the screen.
- In iCloud, navigate to System Preferences and click on the iCloud icon.
- In the App Store, find the quick links on the right side of the screen and click Sign In.
- If you’re using iBooks, click Sign In within the quick links on the right side of the screen. You may also need to click on “Authorize this Computer” to access your purchases.
While there might be some slight variations, all Apple services generally follow a similar layout and sign-in process. If you encounter a different service, you’ll most likely find a Login or Sign In option on the main screen.
Managing Your Apple ID
You have complete control over your Apple ID through the Apple website. Although there’s not a lot you need to do, everything can be managed from this convenient hub.
- Log in to the Apple ID website.
- Click on the Manage your Apple ID button to access all available options.
From here, you can manage your passwords, update email addresses, close your account, and even remove your Apple ID if necessary.
Enhance Your Security
One of the first things you should do after creating your Apple ID is to boost its security. Apple offers a two-factor authentication feature that adds an extra layer of protection. Setting it up is easy:
- Log in to the Apple ID website.
- Click on the Manage your Apple ID button.
- Select “Password and Security” on the left, then choose Two-Step Verification.
- Click Get Started and provide either your cell number or email address. This is where you’ll receive the confirmation messages. Make sure you have quick access to them, as they have a time limit.
- Note the recovery key and keep it in a safe place. It’s important for account recovery.
By enabling two-factor authentication, you significantly enhance the security of your Apple ID. Whenever you log in, a confirmation will be sent to your chosen destination, and you’ll need to respond to gain access. This added step ensures that only you have control over your account, giving you peace of mind.
Adding payment details
Hey there! So, you know that some Apple services aren’t completely free, right? Yeah, they might require a little payment for media, extra storage, or cool extra features. But don’t worry, adding a credit card is super easy and it’s gonna help you get the most out of those services!
Here’s the thing: you don’t actually add the credit card to your Apple ID. You add it to the specific app you’re gonna use, like iTunes or the App Store. Makes sense, right?
On your iPhone or iPad
- First, tap on Settings, then go to iTunes and App Store.
- Now, tap on your Apple ID, and then select View Apple ID. You might need to sign in.
- Tap on Payment Information and enter your card details.
- Lastly, tap Done when you’re all set.
On your Mac
- Start by opening iTunes on your Mac and signing in.
- Next, click on the Account menu, and select View Account.
- Click on Edit next to Payment Type and add your card details.
- Finally, click Done to save your new payment details.
How to recover a lost password
Forgot your password? No worries, my friend! Apple’s got your back with a handy app just for that.
- Head over to the Apple iForgot website.
- Type in your email address in the box and hit Continue.
- If you haven’t enabled the two-factor authentication (seriously, why not?), you can reset your password right there.
- But if you have the two-factor authentication set up, you’ll need the recovery key you got when you first set it up. Enter that key in the box, and a verification message will be sent to you. Just follow the instructions there to reset your password.
If you forget both your recovery key and your password with the two-factor authentication enabled, I’m afraid you’re out of luck. Apple’s gotta keep your account secure, so they can’t give access without that important information. In that case, you’ll need to create a new Apple ID.
How to delete an Apple ID
Had enough of Apple products and services? Well, you can kinda delete all the stuff related to your account from your devices. It’s surprisingly easy, even though Apple loves being part of your life. But hey, keep in mind that you can’t actually delete the Apple ID itself, just the hardware and details connected to it.
On your iPhone or iPad
- Start by tapping on Settings, then go to iCloud.
- Tap on your Apple ID, and then select Devices.
- Choose the device you want to remove, and tap on Remove From Account.
- Tap on Sign Out and then Delete from my iPhone.
- Now, open the iTunes & App Store and tap on your Apple ID.
- Tap on Sign Out.
- Last step, go to Settings and then Music.
- Scroll down to Home Sharing and tap on Sign Out.
On your Mac
- To start, open iTunes on your Mac and sign in.
- Click on the Store option and select View Account.
- Select iTunes in the Cloud and then go to Manage Devices.
- Finally, click on Remove next to each device listed, and then click Done.
- Oh, and don’t forget to click on Store, and then Deauthorize this Computer.
Well, those are the basics of creating and managing your Apple ID. Hope it helps you out!

