A Step-by-Step Guide: Installing Remix OS on Your Computer
Welcoming you to explore an exciting venture of transforming your computer with Remix OS! This comprehensive guide will take you through the simple process, ensuring you have this innovative operating system up and running smoothly. Follow along, and let’s delve into the world of Remix OS together!
First things first, you may be wondering, “What exactly is Remix OS?” Well, my friend, it’s an impressive operating system that brings the power of Android to your computer. Yes, you heard that right! Imagine having access to all your favorite Android apps, games, and features on the big screen of your computer. It’s the best of both worlds!
Now, before we dive into the installation process, make sure you have these essentials ready:
1. A USB flash drive with at least 8GB of storage: This will be the vessel carrying Remix OS to your computer.
2. A computer with a USB port: Where the magic happens!
3. An internet connection: To download the necessary files.
4. A dash of patience and excitement: We’re about to embark on an adventure!
Step 1: Downloading Remix OS
To kickstart this journey, visit the official Remix OS website. There, you’ll find the download link for Remix OS. Ensure you choose the appropriate version for your computer: 32-bit or 64-bit.
Step 2: Preparing the USB Flash Drive
Take your trusty USB flash drive and plug it into your computer’s USB port. Make sure it’s formatted to FAT32, as Remix OS requires this specific format to function flawlessly. If you’re unsure how to format your USB drive, a quick internet search will guide you based on your operating system.
Step 3: Extracting the Remix OS Files
Locate the Remix OS file you downloaded earlier and extract it to your USB flash drive. This process may take a few minutes, so sit tight and enjoy the anticipation!
Step 4: Rebooting Your Computer
Once the extraction is complete, you’re almost there! Restart your computer, and while it’s booting up, press the appropriate key to access the boot menu. This key varies depending on your computer’s manufacturer, but it’s often Esc, F1, F2, or Delete. Don’t worry, your computer will usually display a message indicating which key to press.
Step 5: Booting from the USB Flash Drive
In the boot menu, locate the option that allows you to boot from a USB device. Use the arrow keys to navigate, and hit the Enter key to select the option. Voila! Your computer will now start up with Remix OS.
Step 6: Enjoying Remix OS
Once Remix OS loads up, you’ll be welcomed by a familiar Android interface. Take a moment to soak it all in. Explore the vastness of the Google Play Store, load up your favorite apps, and experience the convenience of multitasking on your computer.
Congratulations, my friend! You’ve successfully installed Remix OS on your computer. You now have the power to elevate your computing experience to the next level. So go forth, enjoy the wonders of Remix OS, and let yourself be amazed at what your computer can now achieve!
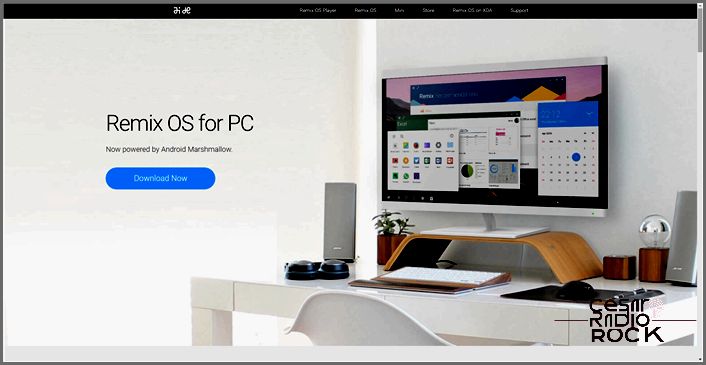
Hey there! I have some exciting news for you. Are you tired of using slow and buggy emulators to run your favorite Android apps on your Windows PC? Well, guess what? There’s an amazing solution just for you. It’s called Remix OS, a specially optimized version of Android designed to run seamlessly on your personal computer. And the best part? It’s completely free! You should definitely give it a try.
Remix OS works like a charm on both newer and older systems. It’s built to deliver lightning-fast performance even on legacy hardware, and on modern systems, it’s like a rocket!
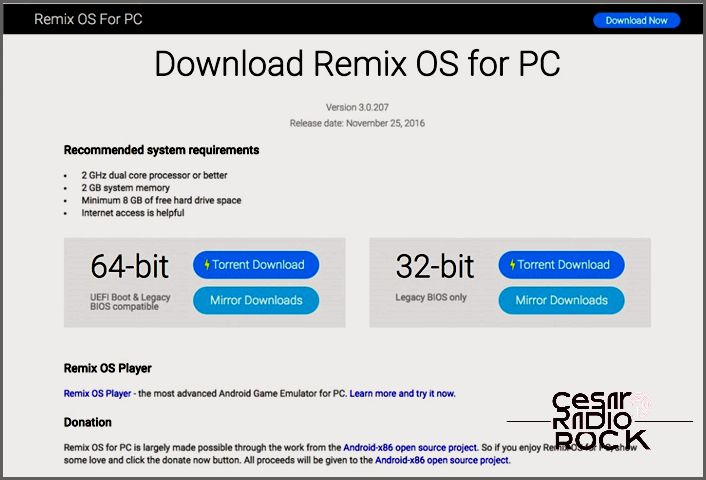
If you’re wondering about compatibility, fret not. There are 32- and 64-bit versions of Remix OS available, depending on your CPU architecture. And you won’t need a super-powered computer either. The system requirements are very modest. All you need to install Remix OS is:
- A 2Ghz dual-core processor or better
- 2GB of system memory
- 8GB of free space on your hard drive or USB drive
- Internet access is preferred
It’s worth mentioning that if you want to enjoy the best speed and experience, it’s recommended to use a USB 3.0 Flash Drive to install Remix OS. In this tutorial, I’ll be installing Remix on a 32GB bootable USB 3.0 flash drive that I purchased for around $15 from Staples.
Now that I’ve explained why you need this operating system and covered the installation prerequisites, let’s move on to getting Remix OS installed on your computer.
Ready to Get Started? Download Remix OS!
The first thing you’ll need is to download the latest stable build of Remix OS for your PC. Head over to the Remix OS website and click on the Download Now button. (Please note that at the time of writing this, the download links on the Remix site were not functional. You might need to do a quick Google search to find a working download. Thankfully, I found one right away.) Make sure to choose the version that matches your computer.
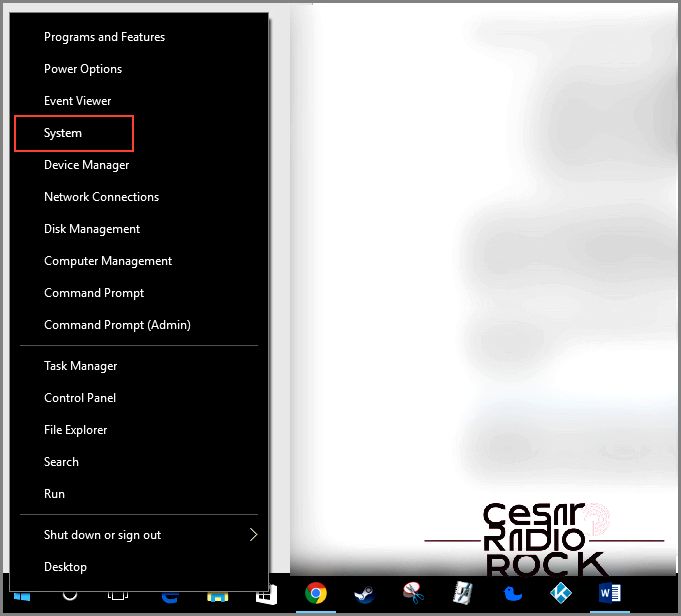
If you’re unsure whether your CPU is 32- or 64-bit, just right-click on the Windows start icon and choose System.
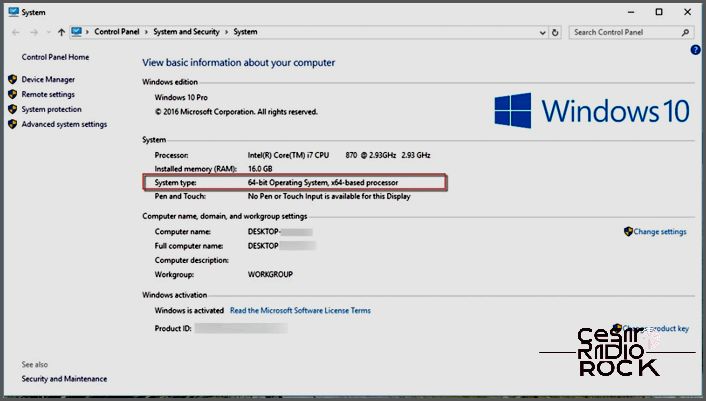
So, here’s what’s gonna happen: a screen is gonna pop up on your computer, and it’s gonna reveal all the info you need about your system. Or, if you’re feeling a bit lazy, you can just press Ctrl-Esc on your keyboard and type “msinfo” into the command box. Easy peasy!
Now, check out the System > System Type section, and you’ll find out whether you’re running a 32-bit or 64-bit computer system. It’s as simple as that!
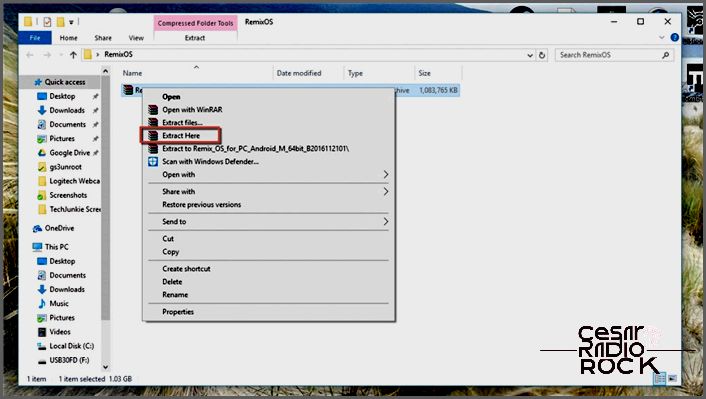
Once you know which version of Remix OS to download, you should go ahead and get it. When the download is complete, click on the option to open the folder, and you will be taken to its location. To make it easily accessible, simply drag the folder to your Desktop. Now, create a new folder on your Desktop called “Remix OS” and move the Remix OS zip file into it. After that, right-click on the zip file and choose the “extract here” option. This will gather all your Remix OS files into one folder on your desktop, making it simple for you to follow along with this tutorial without any confusion.
Installing Remix OS
Now I will guide you through the process of creating a bootable USB Flash Drive. Alternatively, I will also show you how to install Remix OS onto the hard drive of your PC.
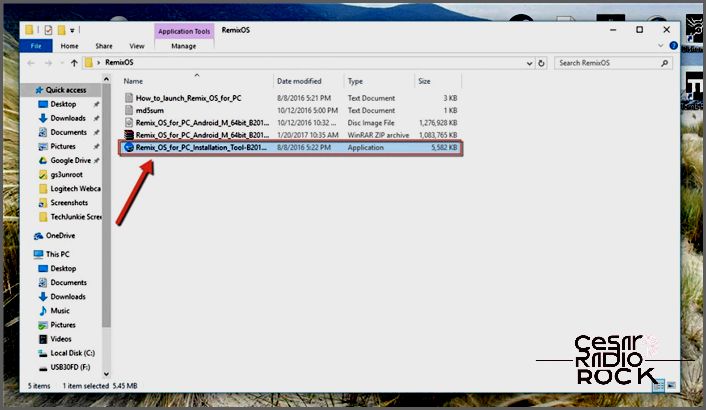
- I’m going to show you how to install Remix OS. It’s really simple, so don’t worry!
- First, find the Remix OS installation tool file and double-click on it. This will start the installation process.
- If you want to create a bootable USB Stick, make sure you have a USB 3.0 stick and insert it into one of the ports on your computer. Then, choose the USB Drive option for File Type.
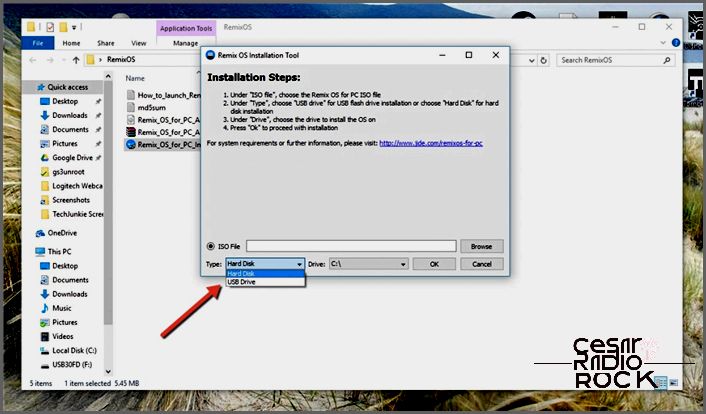
- First, make sure you choose the right drive where the USB 3.0 Stick is connected to your computer.
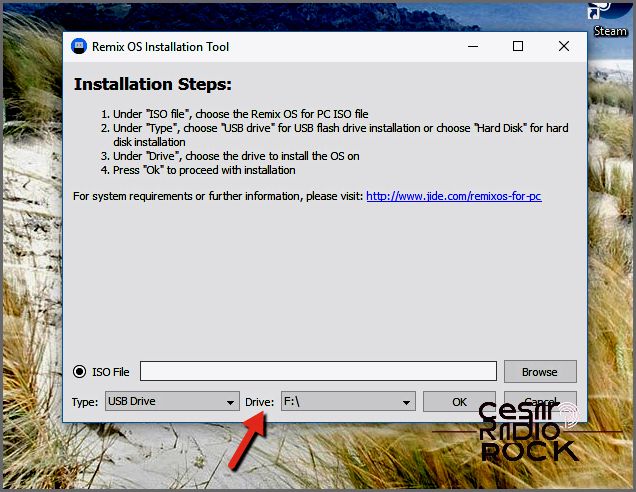
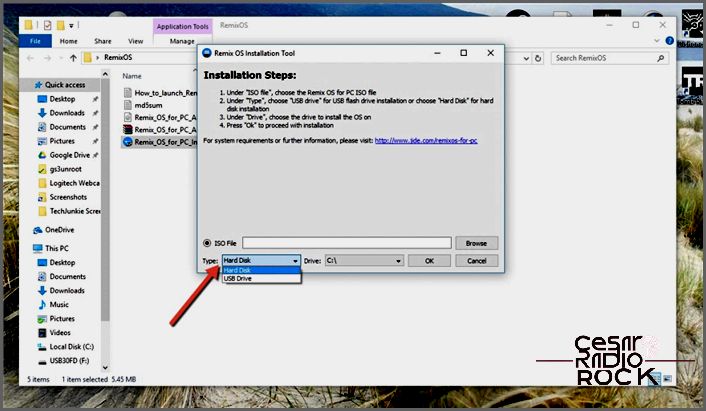
- If you want to install Remix OS directly to your computer’s hard drive, you can do that too. Instead of selecting USB Drive, choose Hard Disk for installation. Hard Disk is the default setting.*However, be extra careful when selecting your Hard Drive as the installation destination. I don’t want you to accidentally erase your PC and lose all your important files and data. If you have a secondary hard drive or if you’ve already partitioned part of your existing hard drive for Remix OS, you can proceed if you’re comfortable.*
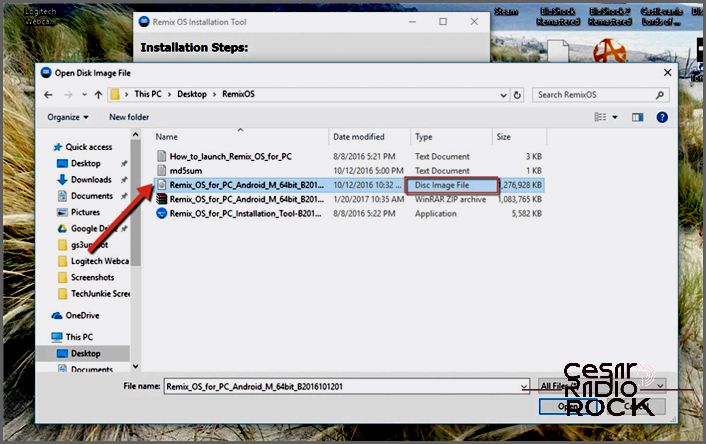
- Next, click the browse button next to the ISO file name box. Go to the “Remix OS” folder you created on your desktop and select the Remix OS for PC disc image. Then, click “Open” to insert the disc image file into the Remix Installation Tool where it says ISO File.
- After that, click OK to start copying the ISO file onto the USB 3.0 Drive.
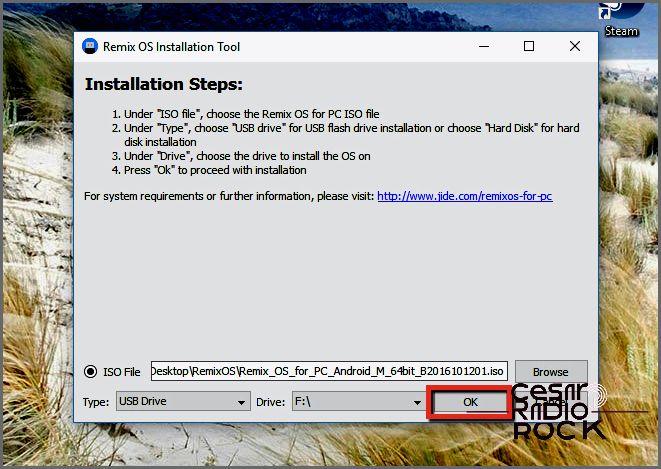
- A pop-up will appear, warning you that all the data on your USB stick will be deleted. If you’re okay with that, click OK.
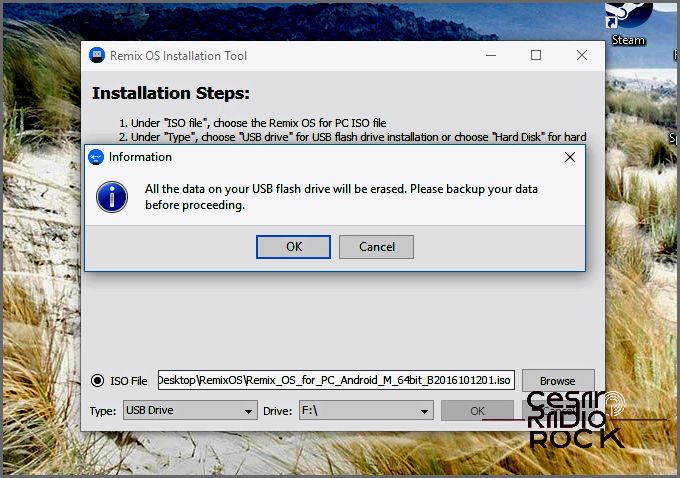
The Remix OS installation tool will now be installed on your USB 3.0 drive, creating a bootable copy of Remix OS. Once the installation is complete, you’ll need to restart your computer and select Bootable USB from the boot options, depending on your computer’s settings.
Now you have a bootable flash drive with Remix OS installed on it! Take some time to explore and see if you like using it. If you do, you can either install it as a dual boot configuration alongside your current version of Windows, or keep it as a bootable USB operating system.
