Time to Create Your very own Windows 10 Recovery Disk!
Hey there! Are you ready to dive into the world of creating your very own Windows 10 Recovery Disk? Well, buckle up because I’m here to guide you through the process!
First things first, let’s talk about why you might need a recovery disk. Sometimes, our beloved computers can encounter issues that prevent them from starting up properly. It could be due to a sneaky virus, a software glitch, or even a hardware malfunction. Whatever the reason, having a recovery disk handy can be a lifesaver!
Now, let’s get down to business. Here’s what you’ll need to create your recovery disk:
1. A blank DVD or USB flash drive: Make sure it has enough storage capacity to hold all the necessary files. Trust me, you don’t want to run out of space midway through!
2. A computer with a DVD burner or a USB port: You’ll need one of these to write the recovery files onto your DVD or flash drive.
3. Your Windows 10 operating system: Don’t worry, you don’t need to reinstall it. Just make sure you have your Windows 10 product key handy.
Alright, let’s jump into the steps to create your recovery disk:
Step 1: Plug in your blank DVD or USB flash drive into your computer.
Step 2: Open your Start menu, type “Control Panel,” and hit Enter. Once Control Panel opens, select “Backup and Restore (Windows 7)”.
Step 3: On the left-hand side of the window, click on “Create a system repair disc” or “Create a recovery drive”.
Step 4: You might be prompted for administrator permission. If so, go ahead and grant it.
Step 5: Follow the on-screen instructions to select your DVD burner or USB flash drive as the location to save the recovery files.
Step 6: Sit back and relax while your computer does its thing. It may take a while, so feel free to grab a snack or catch up on your favorite TV show.
Step 7: Once the process is complete, you’ll have your very own Windows 10 recovery disk! Congratulations!
Now, let me give you a quick rundown on how to use your recovery disk if you ever find yourself in a sticky situation:
Step 1: Insert your recovery disk into your computer.
Step 2: Restart your computer and boot from the recovery disk. You might need to change your computer’s boot settings to prioritize the disk.
Step 3: Follow the on-screen instructions to repair your computer using the recovery disk. It should guide you through the process step-by-step.
And voila! Your computer should be back up and running smoothly in no time!
Remember, having a Windows 10 recovery disk can save you from countless headaches. So, why not take the plunge and create one now? Trust me, future you will thank you!
Happy creating, and may your computer woes be far and few between!

Windows 10 is the most solid version of Windows yet, but that doesn’t mean everything will always go smoothly. If you rely on your computer for school, work, or anything else important, it’s important to have a recovery disk on hand to keep it running smoothly. Here’s how to create a recovery disk in Windows 10.
A recovery disk can be a lifesaver if something goes wrong with your Windows 10 system. It allows you to troubleshoot issues, reset your computer, and quickly rebuild it if necessary. It’s important to note that a recovery disk does not store your personal files, movies, music, or games. For that, you’ll need a separate backup solution.
Typically, a USB drive is used as a recovery disk for Windows 10. If you have the 32-bit version of Windows, you’ll need at least 8GB of space on your USB drive. If you have the 64-bit version of Windows, you’ll need at least 16GB of space. It’s worth noting that you can only create a recovery disk for the same bit version of Windows that you’re currently running.

How to Make a Recovery Disk in Windows 10
If you have your USB drive ready, let’s go ahead and create the recovery disk.
- Insert your USB drive into your computer.
- Right-click and choose Format. Use NTFS as the file system. Keep in mind that this will erase all data on the USB drive, so make sure there’s nothing important on it.
- Type or paste ‘Recoverydrive’ into the Search Windows/Cortana box.
- Wait for the Recovery Drive app to open.
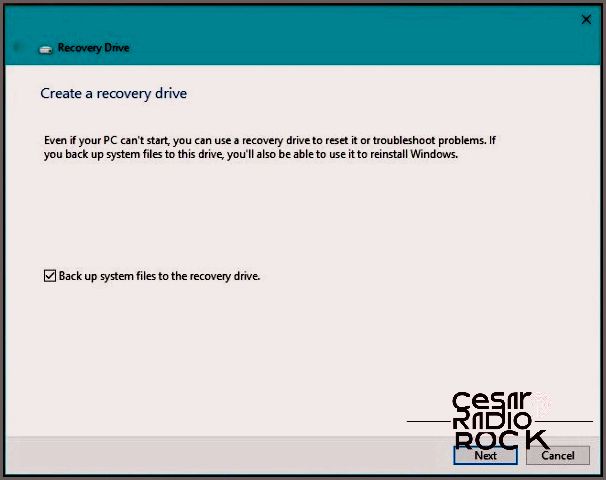
- Select ‘Back up system files to the recovery drive’ and click Next.
- Choose your USB drive from the list and click Next.
- Click Create to start making the recovery disk.
Depending on the size of the drive and the speed of your computer, this process may take some time. Be patient and don’t do anything until you see the final window indicating that the recovery drive is ready. Then, select Finish.
Don’t forget to label the drive and keep it in a safe place until you need it.

Resetting Windows 10 with your recovery drive
When the time comes to use your recovery drive, you’ll be grateful that you have it. You usually only need it when something goes terribly wrong with your computer that normal tools can’t fix. In situations like this, your options are usually to reset your PC or use the recovery drive. I’m going to choose the latter.
Even if your computer isn’t working, you should know that resetting with the recovery drive will erase your personal data. Any applications stored on your C: drive will also be removed, along with any apps or personal settings.
- Insert the USB drive into your PC while it’s powered off.
- Start your computer and set it to boot from the USB drive.
- Wait for the loader to finish and choose your keyboard layout.
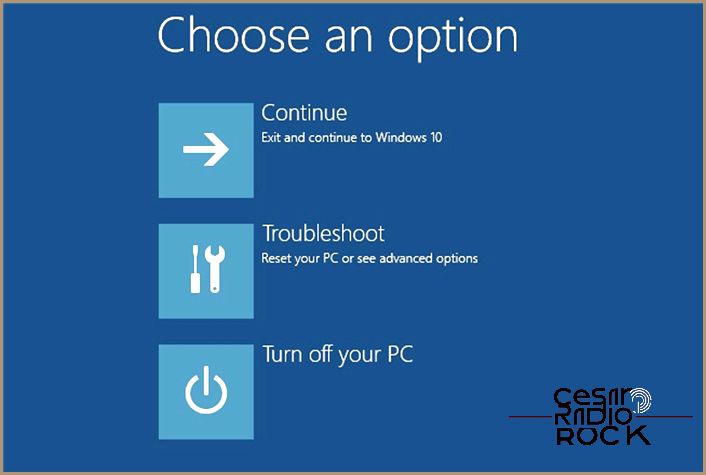
- Select “Troubleshoot” and then “Recover from a drive”.
- Choose whether to “Just remove my files” or “Clean the drive fully”.
- Select “Recover”.
The “Recover” option is a command, so once you choose it, Windows will begin checking the validity of the drive and preparing for the reset.
The choice you make between “Just remove my files” and “Clean the drive fully” depends entirely on what caused the need for the reset. If it’s a Windows configuration issue, you could try the “Just remove my files” option and then use data recovery software to retrieve them. However, there are no guarantees.
Choosing “Clean the drive fully” means performing a full disk format, erasing everything.
The recovery process may take some time. You’ll see various progress windows and indicators as it loads. The black “Recovering this PC” window should display a percentage indicator and circle dots to show that it’s working. Don’t worry if it pauses occasionally, as it just means the CPU is being utilized for the reset.
Once the reset is complete, you’ll be greeted with the initial Windows 10 setup screen.
- Select your country or region, language, keyboard layout, and time zone when prompted. Then click “Next”.
- If you’d like, read the EULA and click “Accept”.
- Follow the steps of the Windows 10 setup as guided by the wizard.
Backing up everything
Using a recovery disk doesn’t preserve your personal files and settings. While it’s possible to recover them using data recovery software, it’s not a foolproof method and may yield unsatisfactory results. So, as soon as you start accumulating files and folders on your computer, you should also implement a backup solution to keep them safe.
Since OneDrive is integrated into Windows 10, it makes sense to use it until you find a better or more flexible option.
As you can see, creating a recovery disk in Windows 10 is actually quite simple. If you have a spare USB drive, I recommend giving it a try now. You never know when you might need it!
