Making Your Own OS X El Capitan USB Installer for the Developer Beta
Hey there! I’ve got some great tips on how you can create your very own OS X El Capitan USB installer for the Developer Beta. Let me walk you through the process step by step.
First things first, make sure you have all the necessary tools handy. You’ll need a Mac running OS X Yosemite, a USB flash drive with at least 8GB of space, and a copy of the OS X El Capitan Developer Beta installer. Got everything? Awesome, let’s get started!
1. Plug in your USB flash drive to your Mac. Be sure to save any important files on the drive, as we’ll be erasing everything.
2. Now, open Disk Utility. You can find it in the Utilities folder within your Applications.
3. In Disk Utility, you’ll see your USB flash drive listed on the left sidebar. Click on it to select it.
4. Click on the “Erase” tab on the main panel. Here, give your USB flash drive a name, choose “Mac OS Extended (Journaled)” as the Format, and click on “Erase”. This will erase all the data on your USB flash drive and prepare it for the installation.
5. Once the erasure is complete, close Disk Utility.
6. Now, locate the OS X El Capitan Developer Beta installer. It should be in your Downloads folder. If not, make sure you have downloaded it from the Apple Developer website.
7. Open up Terminal. You can find it in the Utilities folder too.
8. Type the following command in Terminal, making sure to replace “USBDRIVE” with the name you gave to your USB flash drive in Step 4:
“`
sudo /Applications/Install\ OS\ X\ El\ Capitan\ Developer\ Beta.app/Contents/Resources/createinstallmedia –volume /Volumes/USBDRIVE –applicationpath /Applications/Install\ OS\ X\ El\ Capitan\ Developer\ Beta.app –nointeraction
“`
Press Enter and enter your administrative password when prompted. This command will start creating the bootable USB installer.
9. Terminal will display the progress of the installation process. This may take some time, so sit back and relax while it works its magic.
10. Once the process is complete, Terminal will display the message “Install media now available at /Volumes/OS X Install ESD”. This means your OS X El Capitan USB installer is ready to go!
Now, you can use this USB installer to install OS X El Capitan Developer Beta on any compatible Mac. Remember to follow the installation instructions provided by Apple to ensure a smooth installation.
I hope this guide has been helpful in creating your own OS X El Capitan USB installer. Enjoy exploring the cool new features and improvements that El Capitan has to offer!

I’m going to share with you a simple way to create a physical OS X USB installer. While the Mac App Store has made digital distribution and in-place upgrades of OS X easy, there are times when having a physical installer can come in handy. In this guide, I will walk you through the steps to create an OS X El Capitan USB installer.
Step 1: Get the OS X El Capitan Installer

Alright, the first thing you need to do is get the OS X El Capitan installer from the Mac App Store. Right now, it’s only available to Apple Developer Program members, but it’ll be accessible to the public when the OS X El Capitan public beta program starts in July. One thing to note is that the steps in this article only work with the El Capitan installer for the Developer Beta because of changes Apple made to the installer file naming. We’ll have updated instructions for the public beta and final version when they come out later this year.
Once you’ve redeemed your developer code from the Mac App Store, the OS X El Capitan installer app will download to your Mac’s Applications folder and automatically open. Just press Command-Q on your keyboard to close the app. We’re not interested in installing El Capitan as an upgrade. Make sure you don’t move this installer out of the Applications folder because the Terminal commands later on require it to be in that default location.
Now, let’s move on to the next step: preparing your USB drive.
To create an OS X El Capitan USB installer, you’ll need a USB drive with at least 8GB of space. You can use a cheaper USB 2.0 drive or, if your Mac supports USB 3.0, a faster USB 3.0 drive like the SanDisk Extreme. This will speed up both the installer creation process and the actual OS X El Capitan installation.
Before we proceed, remember that our creation process will erase everything on the USB drive, so back up anything important you have stored on it. When you’re ready, connect the USB drive to your Mac and launch Disk Utility, which you can find in the Applications > Utilities folder or by searching for it with Spotlight.
In Disk Utility, select your USB drive from the list on the left. Be careful to choose the correct drive if you have multiple devices connected to your Mac. Note that you need to select the drive, not the volume. In our screenshot, we have a USB drive named “8GB SanDisk Cruzer Media” with a volume labeled “USB.” Make sure you choose your USB drive and then click the Partition tab on the right side.
On the Partition tab, select “1 Partition” from the “Partition Layout” drop-down menu. This tells Disk Utility that we want to create a new partition with specific options. Then, go to the Format menu on the right and choose “Mac OS Extended (Journaled).” In the “Name” box, give the partition the name “Untitled.” This name is important for compatibility with our Terminal commands in the next step, but you can change it later if you want.
Lastly, click the Options button at the bottom and make sure the partition scheme is set to “GUID Partition Table.” Click OK to save your choice and close the partition scheme window. Then, click Apply to format your USB drive with the correct configuration. After a short processing time, your USB drive will appear on your Desktop and in Finder with the name “Untitled.”
Now we’re ready for step three: creating your OS X El Capitan USB installer.
Please note that the following steps are specifically for the OS X El Capitan Developer Beta. They won’t work with the public beta or final El Capitan installers unless you modify them. If you want to create a USB installer for those versions, please use our search to find the correct instructions.
With your USB drive ready, open Terminal (located in Applications > Utilities), copy the command below, and press Enter to execute it. If prompted, enter your admin password:
sudo /Applications/Install OS X 10.11 Developer Beta.app/Contents/Resources/createinstallmedia –volume /Volumes/Untitled –applicationpath /Applications/Install OS X 10.11 Developer Beta.app –nointeraction

When creating a USB installer for OS X El Capitan, you’ll be able to track progress using a meter in Terminal. The time it takes to complete this process will vary based on the speed of your Mac’s hard drive, the speed of your USB drive, and the USB interface on your Mac (USB 2.0 or USB 3.0). For instance, with a fast USB 3.0 drive on a 2014 MacBook Pro, you can create an OS X El Capitan USB installer in just two or three minutes. However, if you’re using a USB 2.0 drive, it may take up to ten minutes.
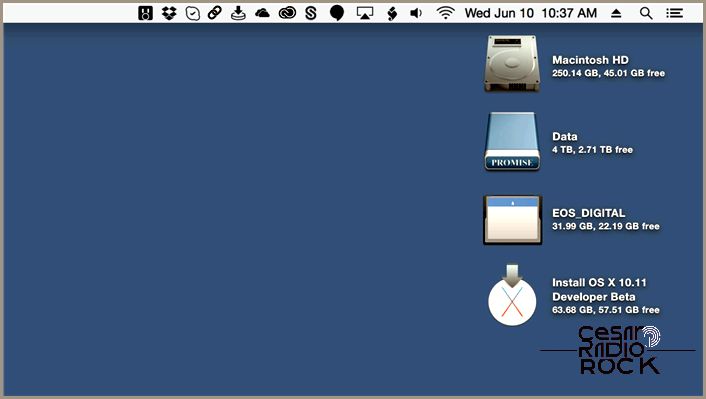
Terminal will notify you when the process is finished, and you’ll see the OS X El Capitan USB installer on your desktop. If you like, you can even give the installer a custom icon for a personalized touch.
Once you have the installer, you can eject it from your computer and use it to perform a clean installation of OS X El Capitan on any compatible Mac. Simply connect it to your Mac’s USB port and hold down the Alt/Option key while booting to access the Startup Manager. Choose the El Capitan USB installer and follow the instructions on the screen to finish the installation.
